By Jasn Rathore18 MAY, 2026
Tools & Productivitytutorial

The Last Git and GitHub Guide you will Ever Need

Prerequisites

Before we begin, make sure you have:

  • A Windows computer with administrator privileges
  • An active internet connection
  • A GitHub account (create one at github.com if you don't have one)
  • Your default browser logged into GitHub

Part 1: Installing Git

Git is the version control system that tracks changes in your code. Follow these visual steps to install it:

Step 1: Download Git

  1. Visit the official Git download page: https://git-scm.com/downloads/win
  2. Click on "Git Standalone Installer" to download the latest version

Step 2: Run the Installation Wizard

Launch the downloaded installer and follow these screens:

Welcome Screen
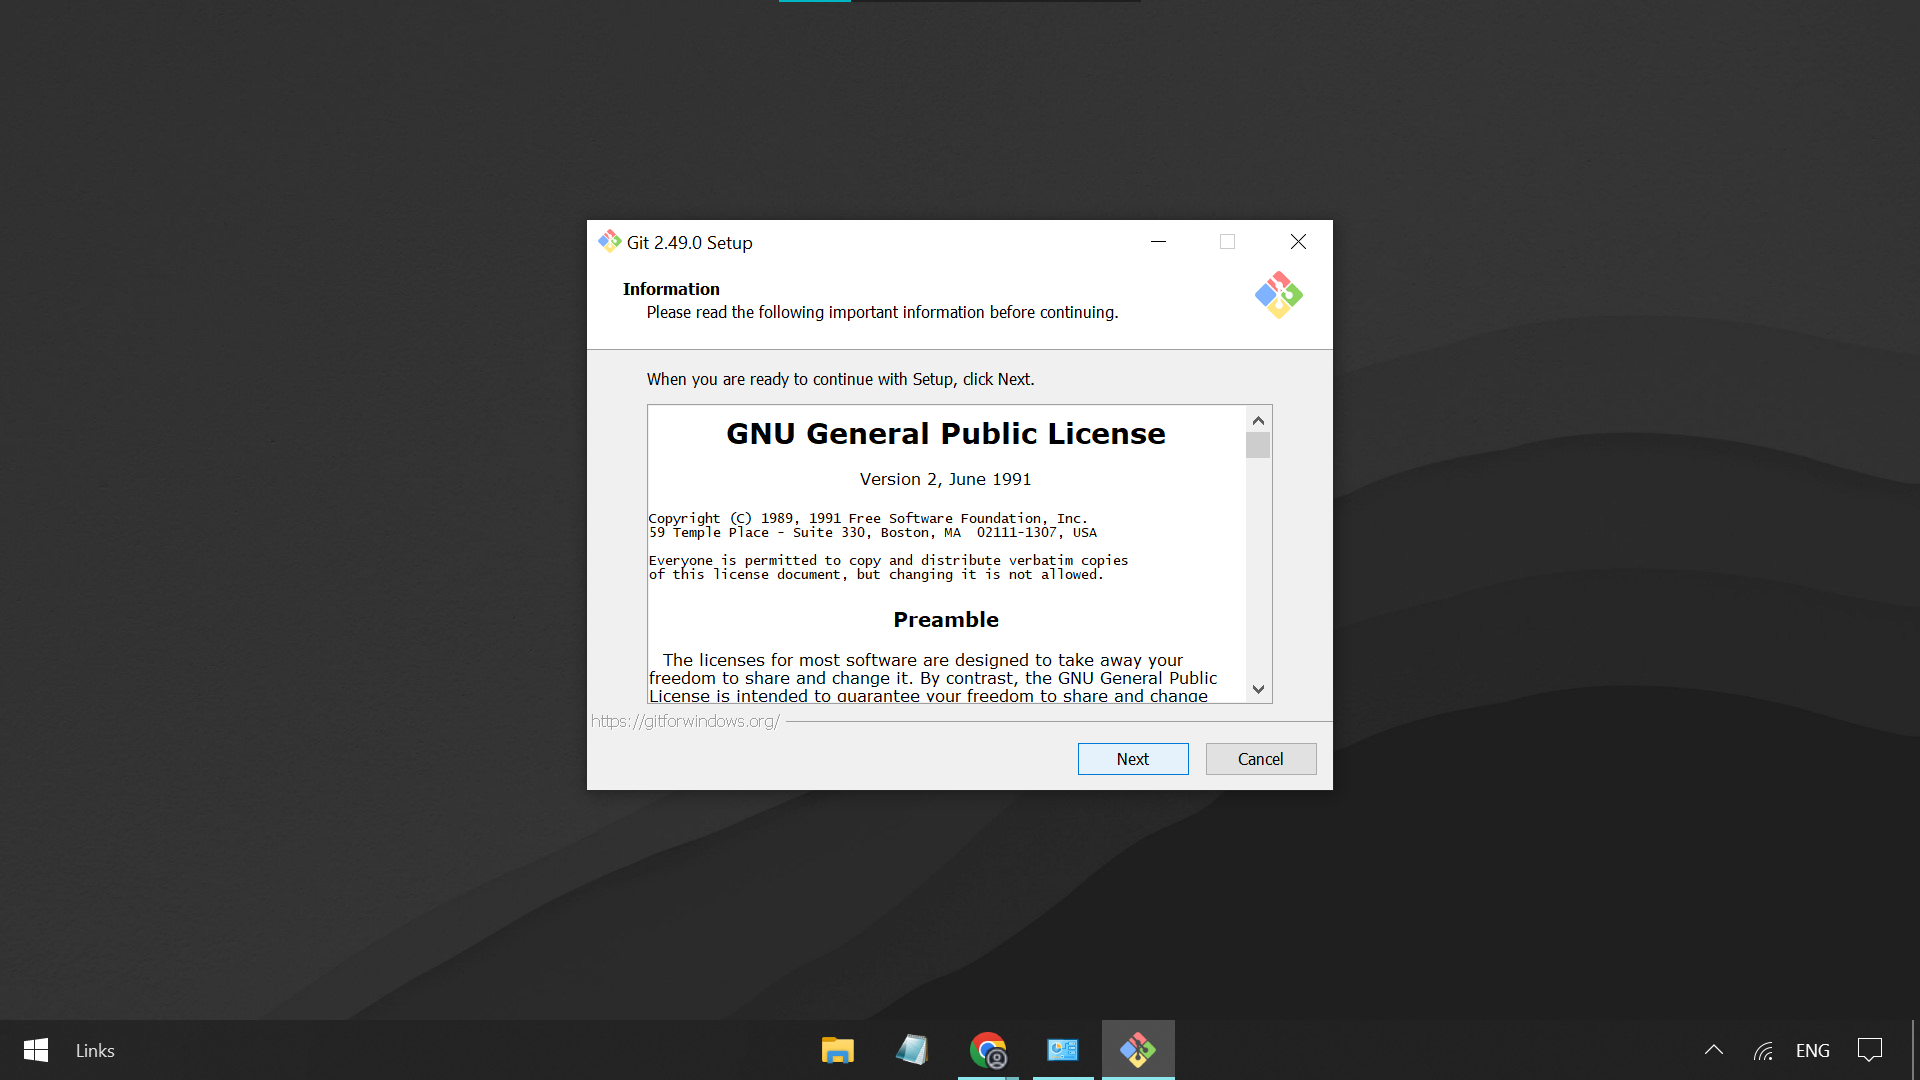
Git Welcome

  • Click "Next" to begin the installation

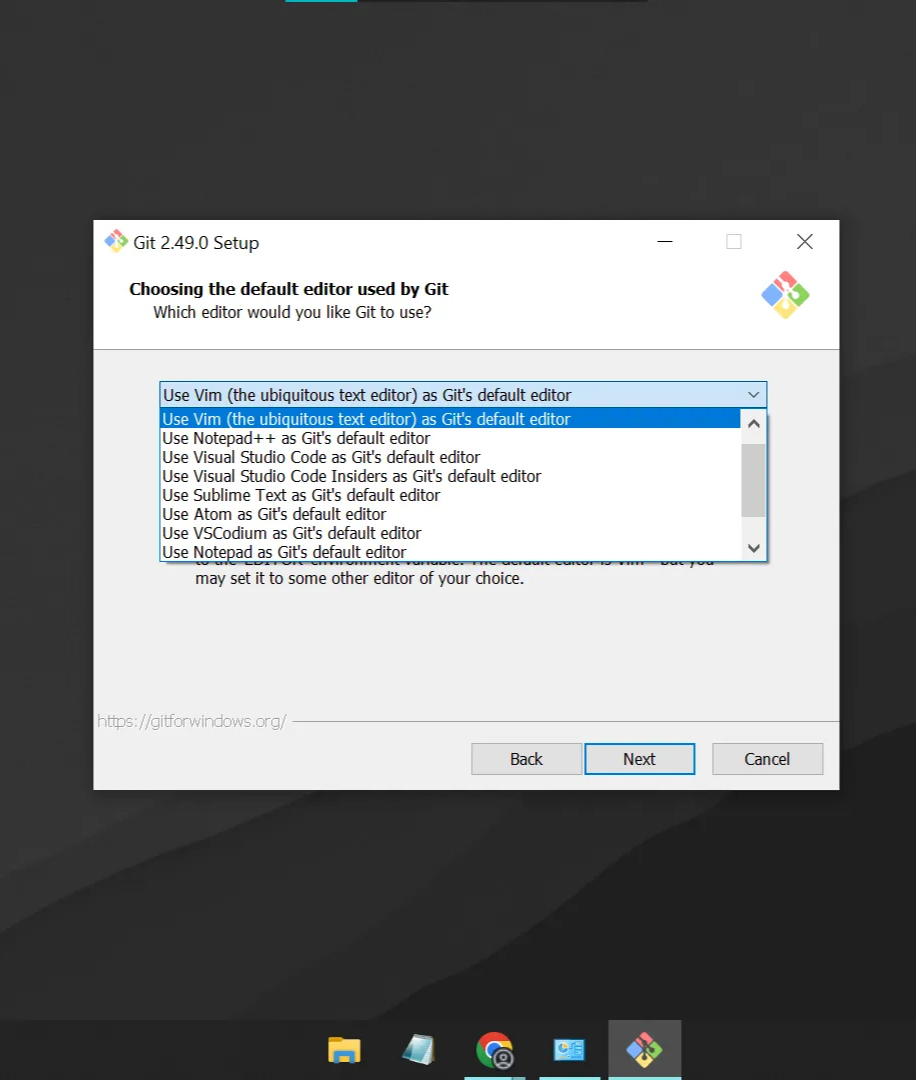
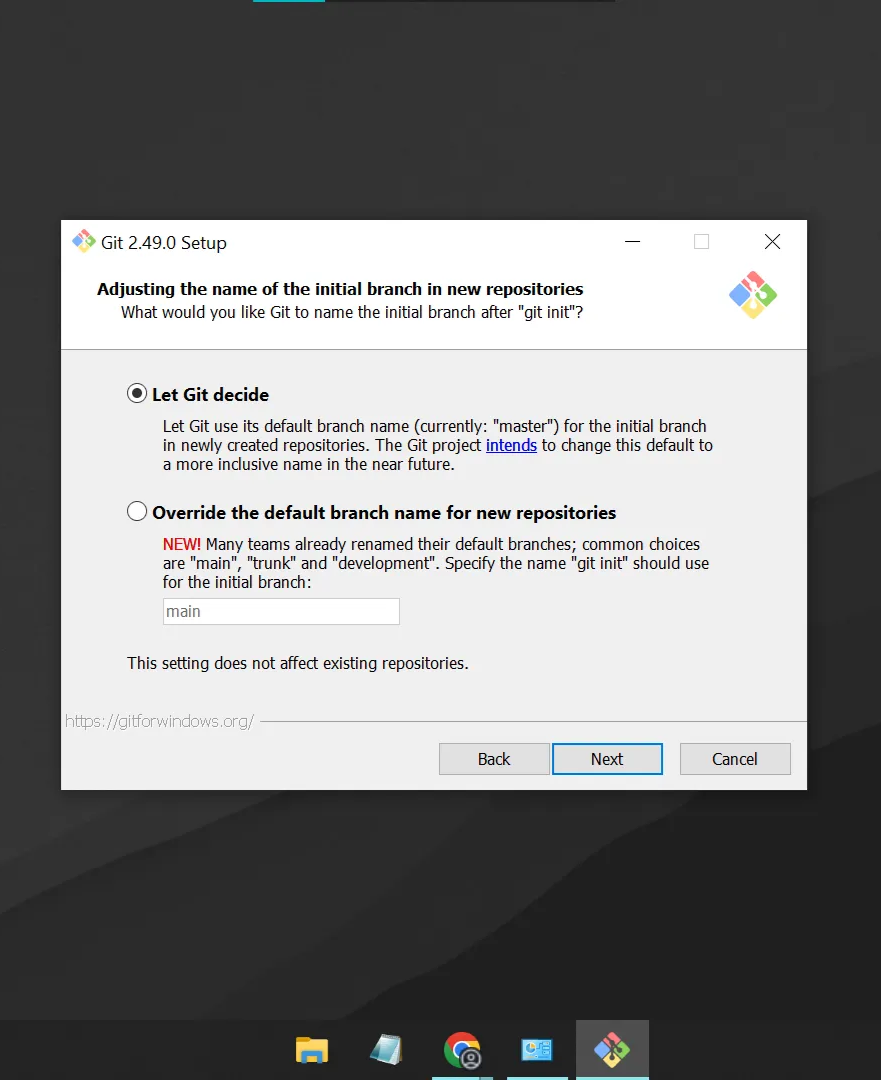
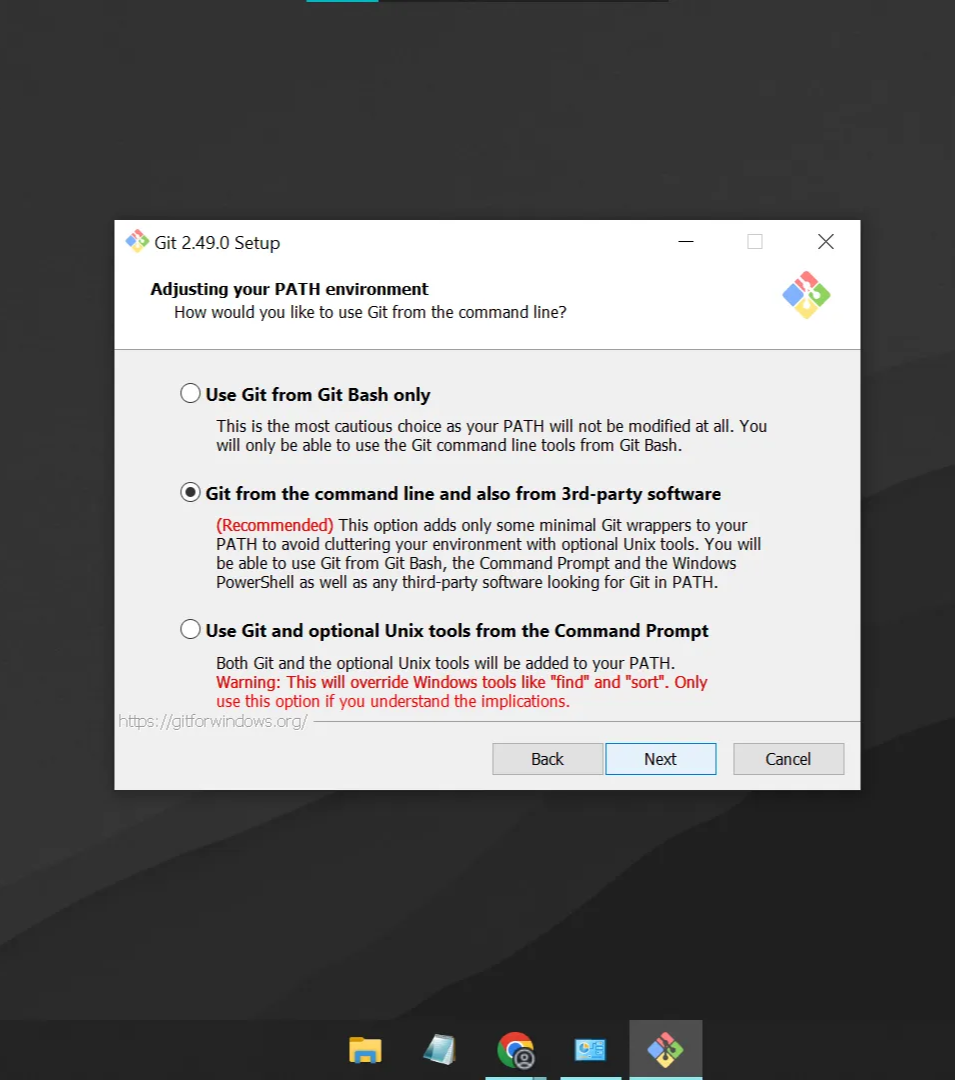
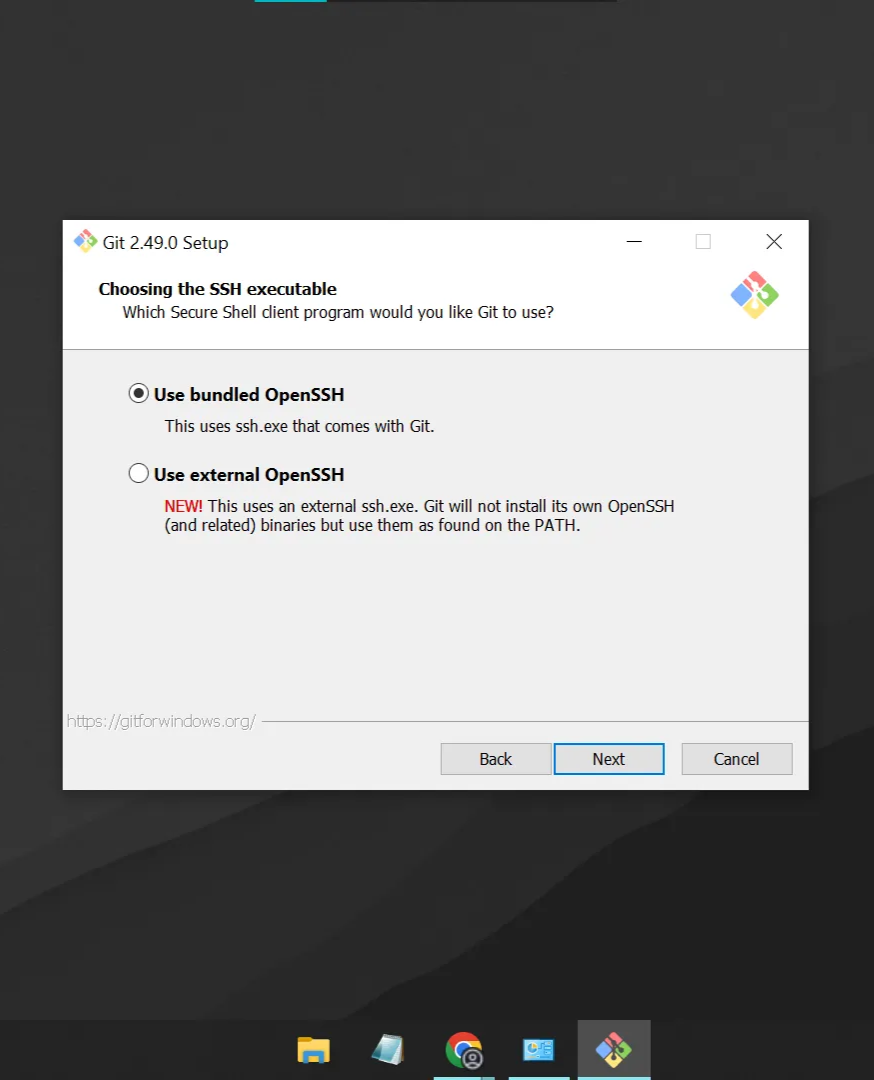
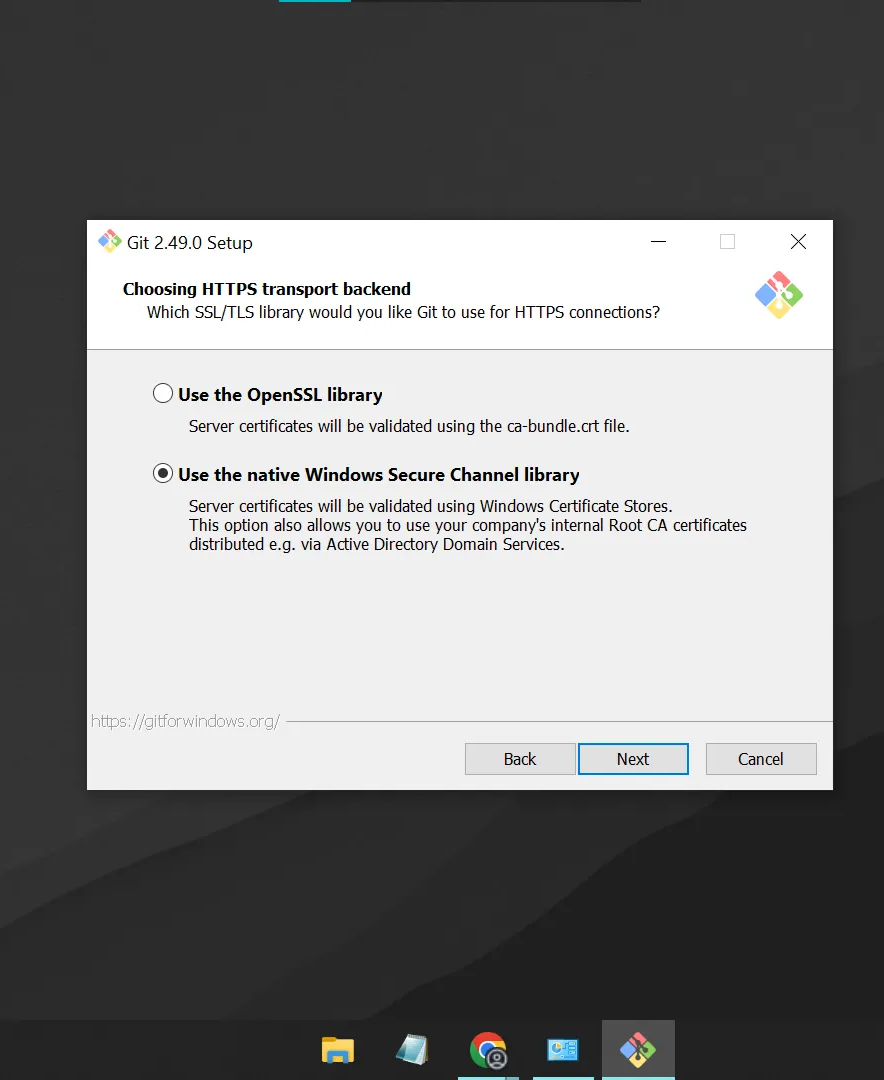
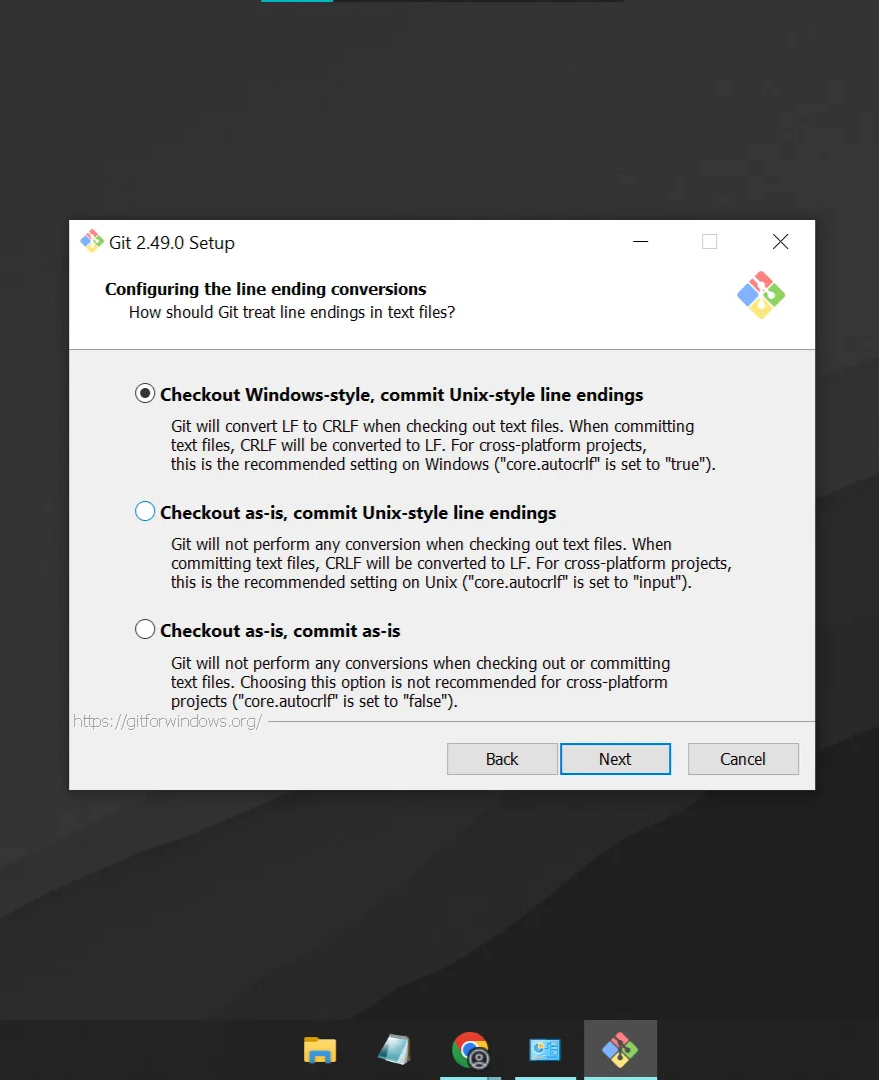
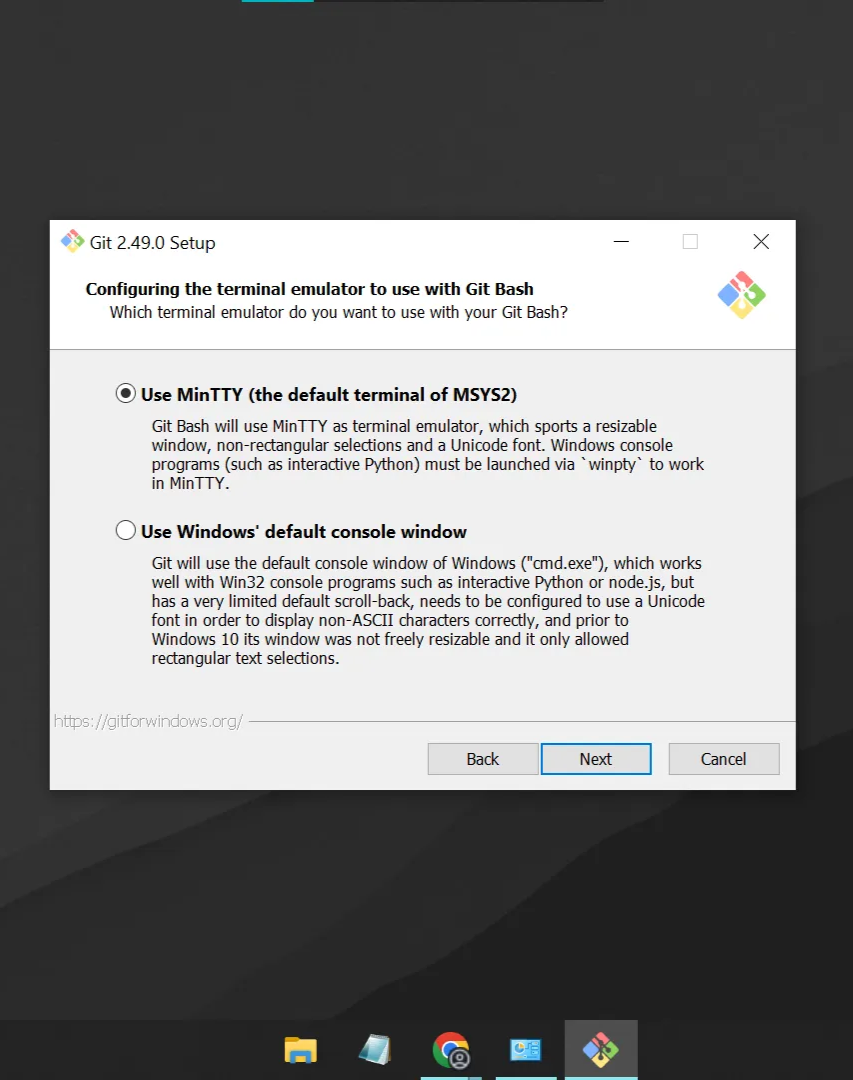
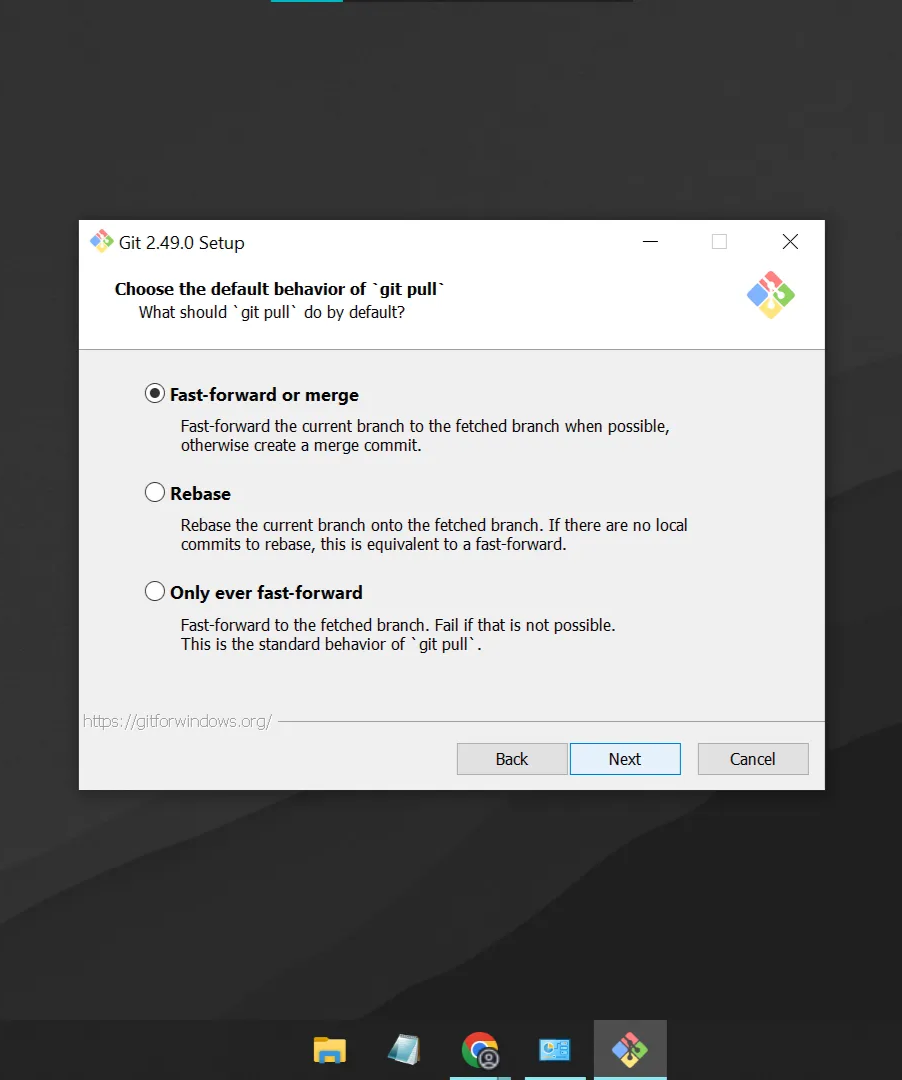
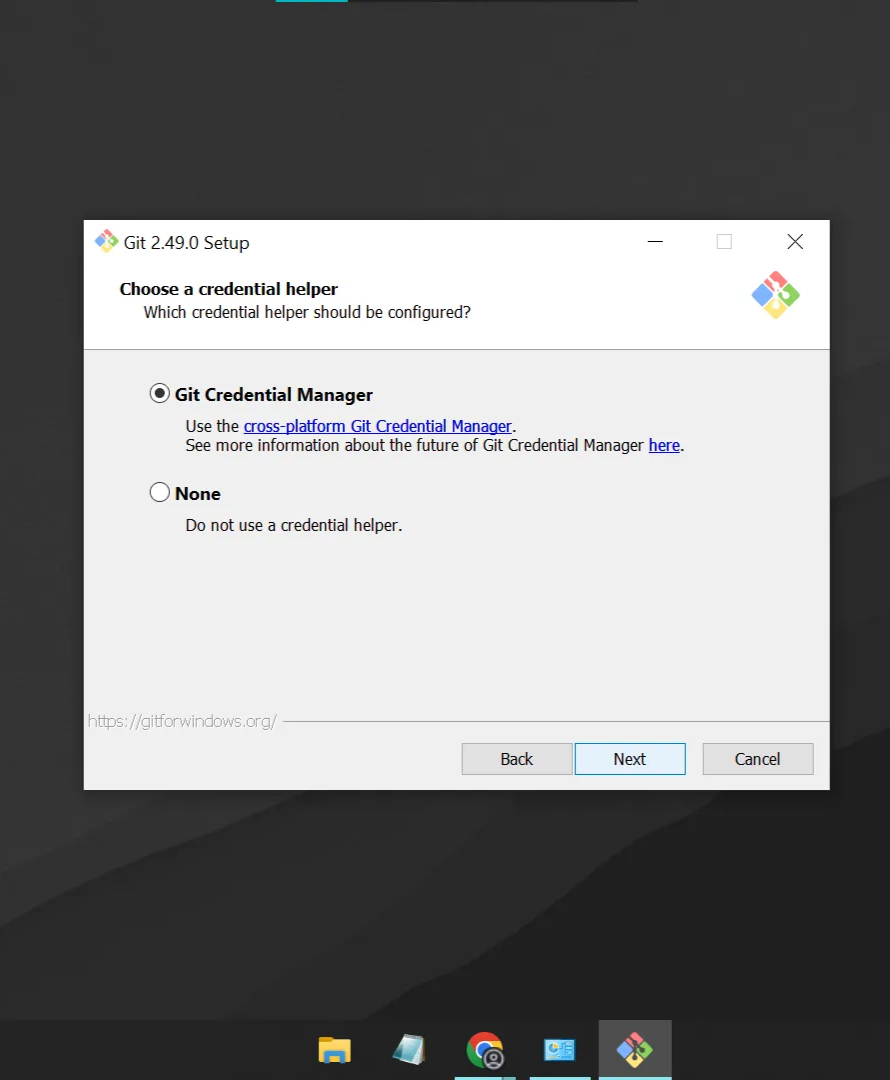
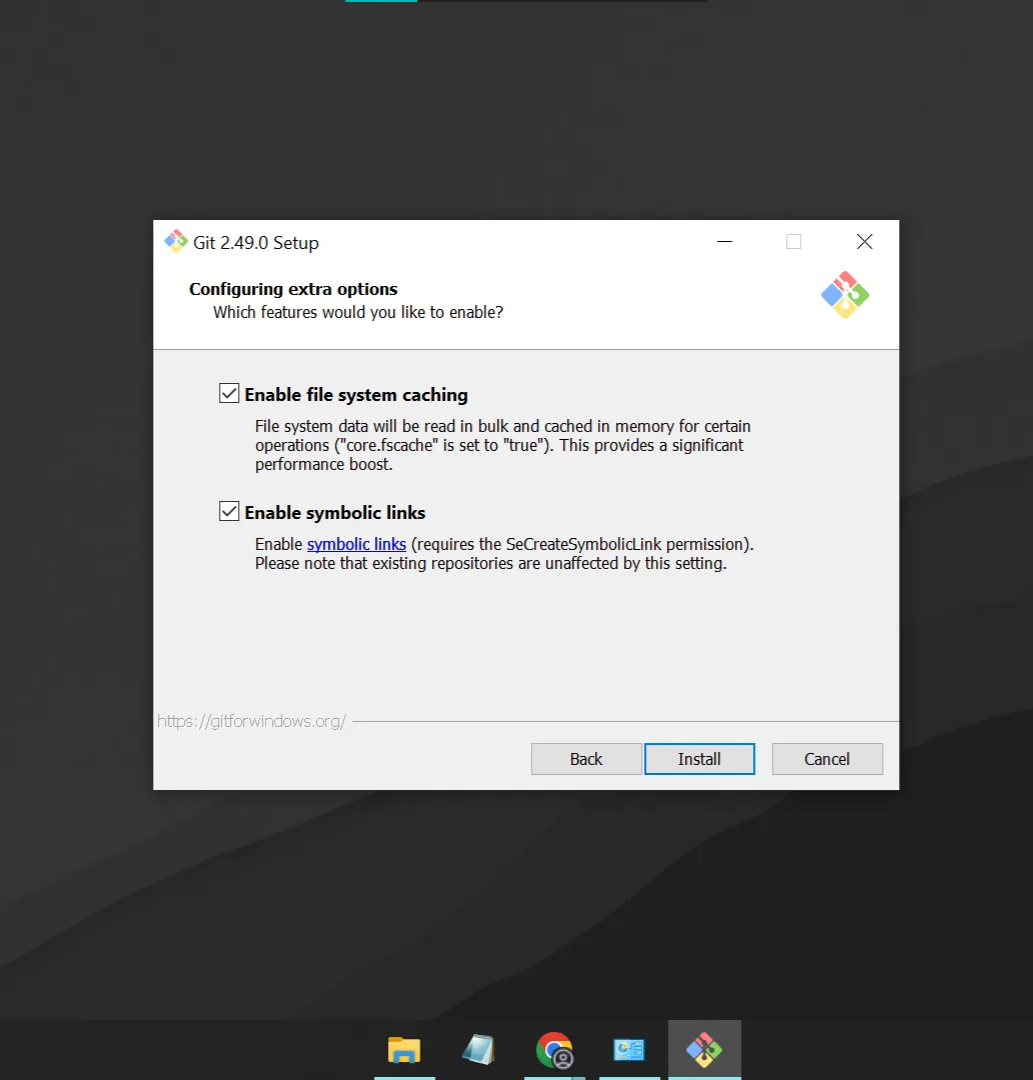
Installation Options The installer will present you with multiple configuration screens. For beginners, it's recommended to keep all default settings by clicking "Next" through each screen:
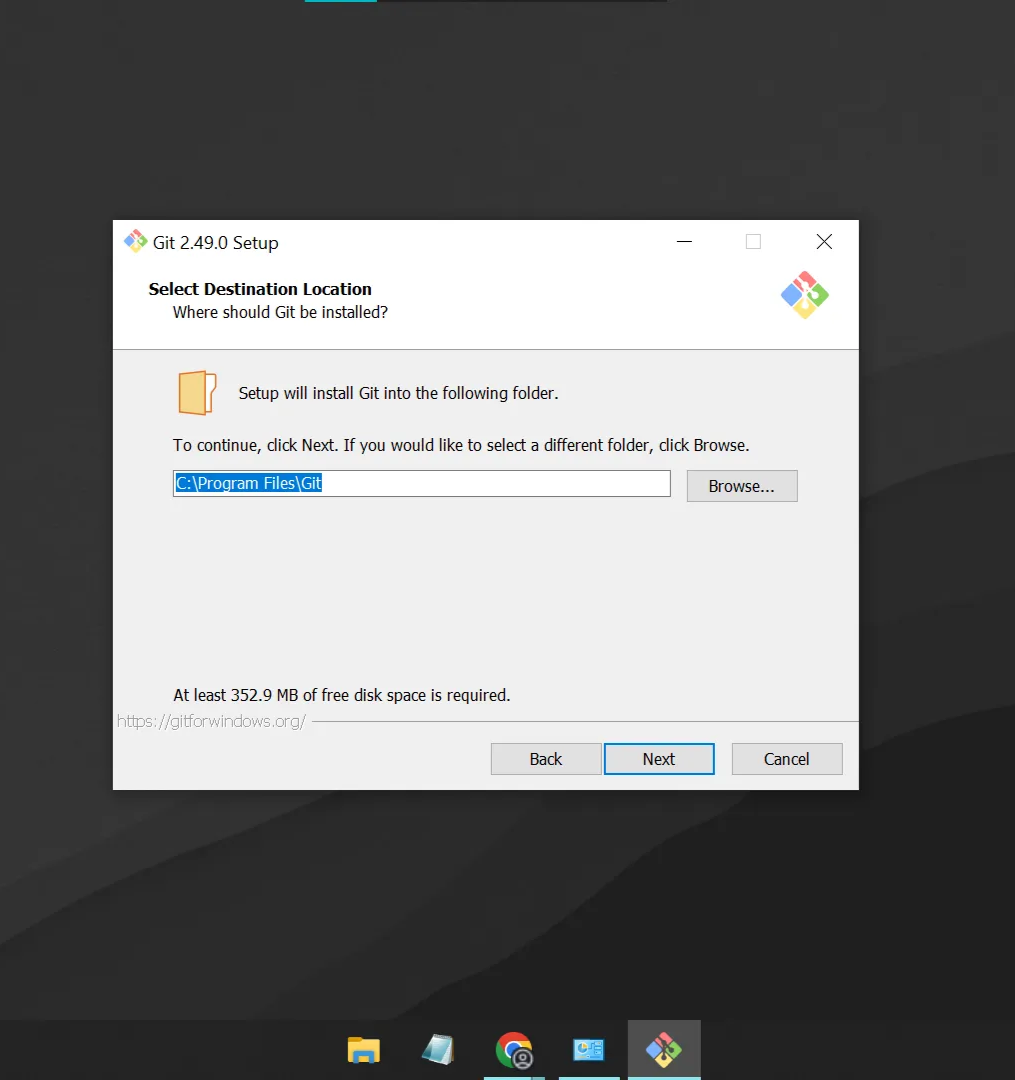
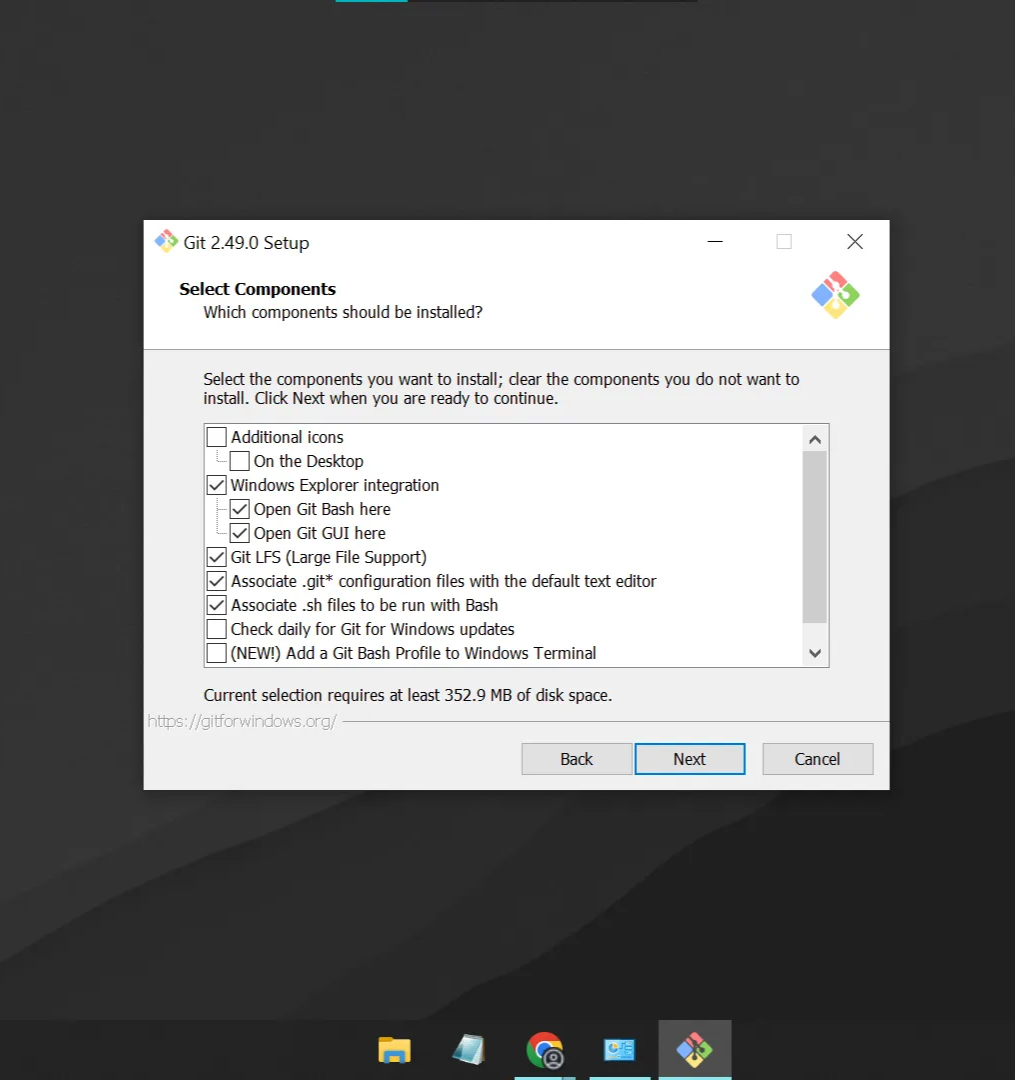
Installation Step 2 Installation Step 3 Installation Step 4 Installation Step 5 Installation Step 6 Installation Step 7 Installation Step 8 Installation Step 9 Installation Step 10 Installation Step 11 Installation Step 12 Installation Step 13

Installation Step 14

Step 3: Verify Git Installation

Open PowerShell

  1. Search for "PowerShell" in the Start menu and open it

    Open PowerShell

Check Git Version

  1. Type the following command and press Enter:
git --version
  1. You should see the Git version displayed, confirming successful installation

    Git Version Check

Git is now successfully installed!


Part 2: Installing GitHub CLI

GitHub CLI allows you to interact with GitHub directly from your command line.

Step 1: Download GitHub CLI

  1. Visit the GitHub CLI website: https://cli.github.com/
  2. Download the Windows installer

Step 2: Install GitHub CLI

Run the Installer

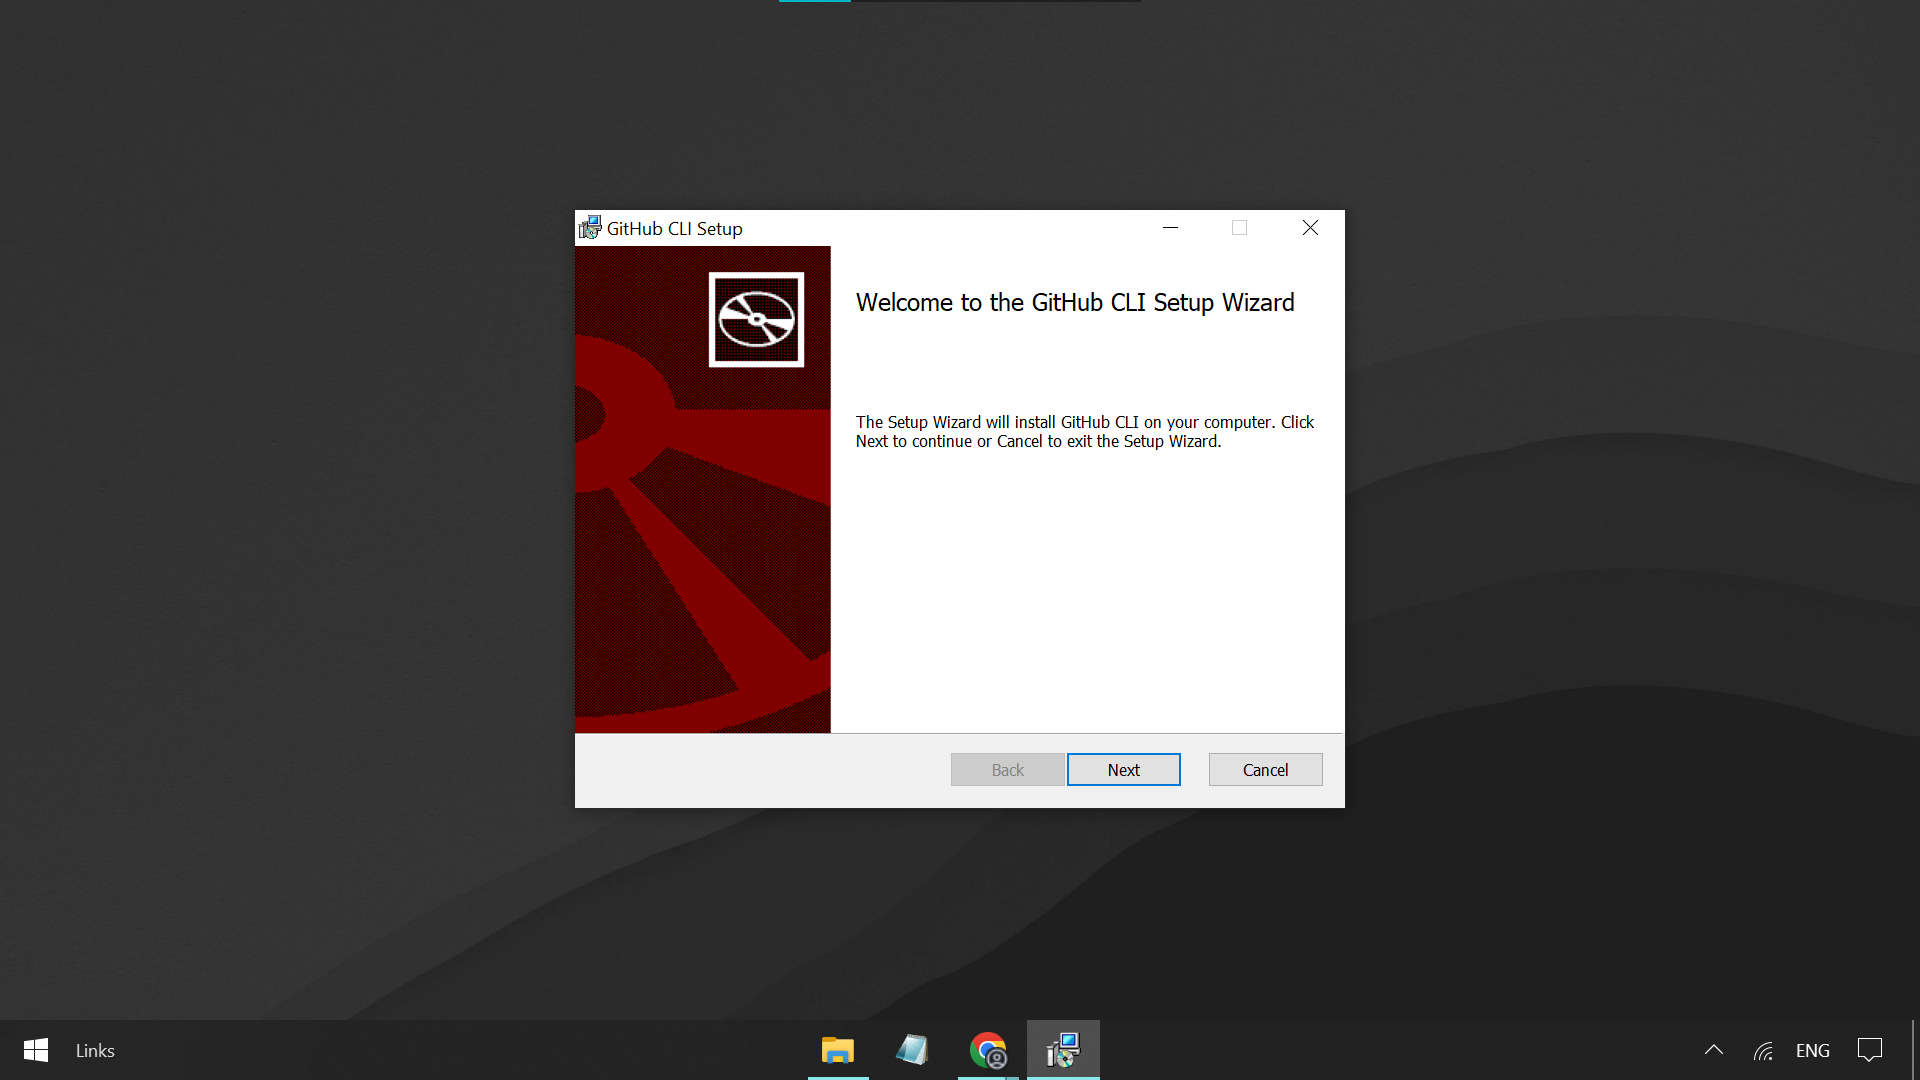
  1. Launch the downloaded installer

    GitHub CLI Installer

Installation Directory

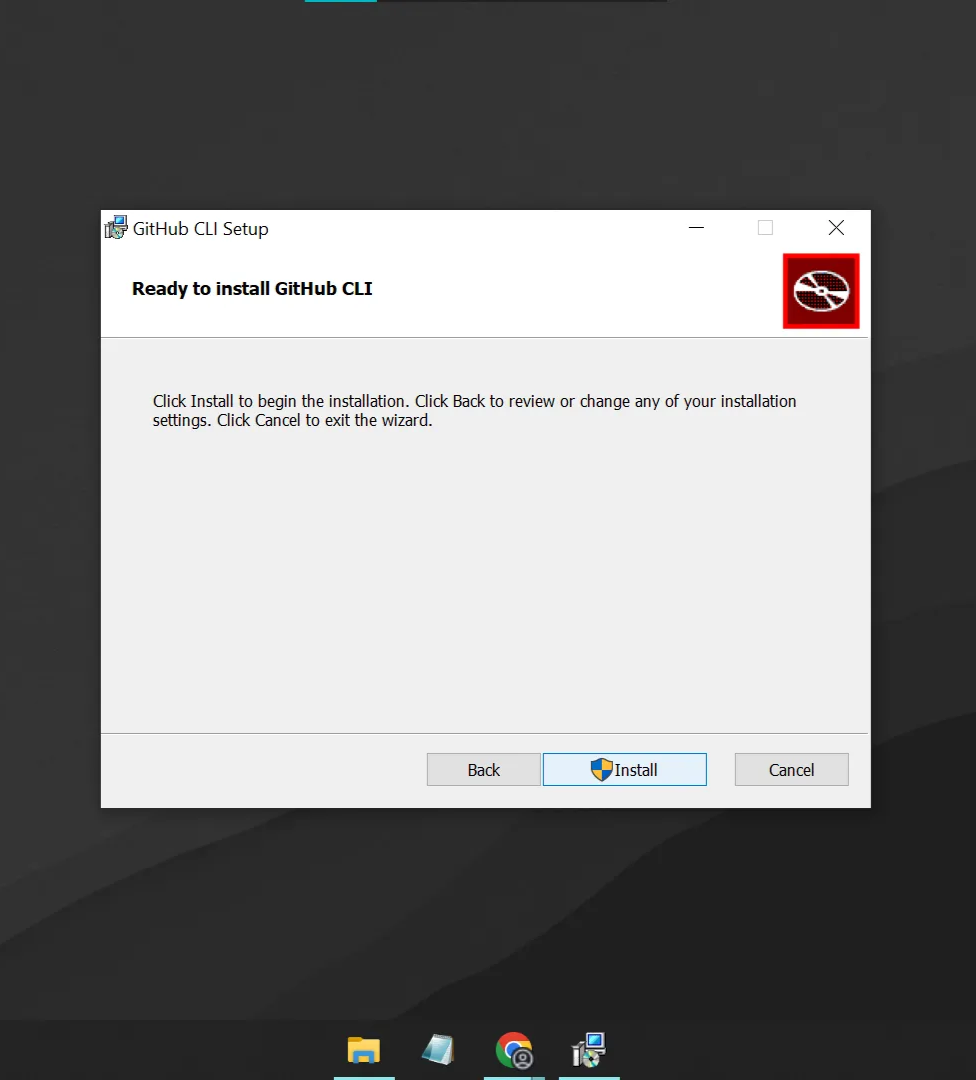
  1. Keep the default installation directory and proceed with the installation
GitHub CLI Setup Step 1 GitHub CLI Setup Step 2

Step 3: Verify GitHub CLI Installation

Open PowerShell

  1. Open PowerShell (if not already open)

    Open PowerShell

Check GitHub CLI Version

  1. Type the following command:
gh --version
  1. You should see the GitHub CLI version information

    GitHub CLI Version

GitHub CLI is now installed!


Part 3: Authenticating with GitHub

Now we'll connect your local setup with your GitHub account.

Step 1: Start Authentication Process

Initialize Login

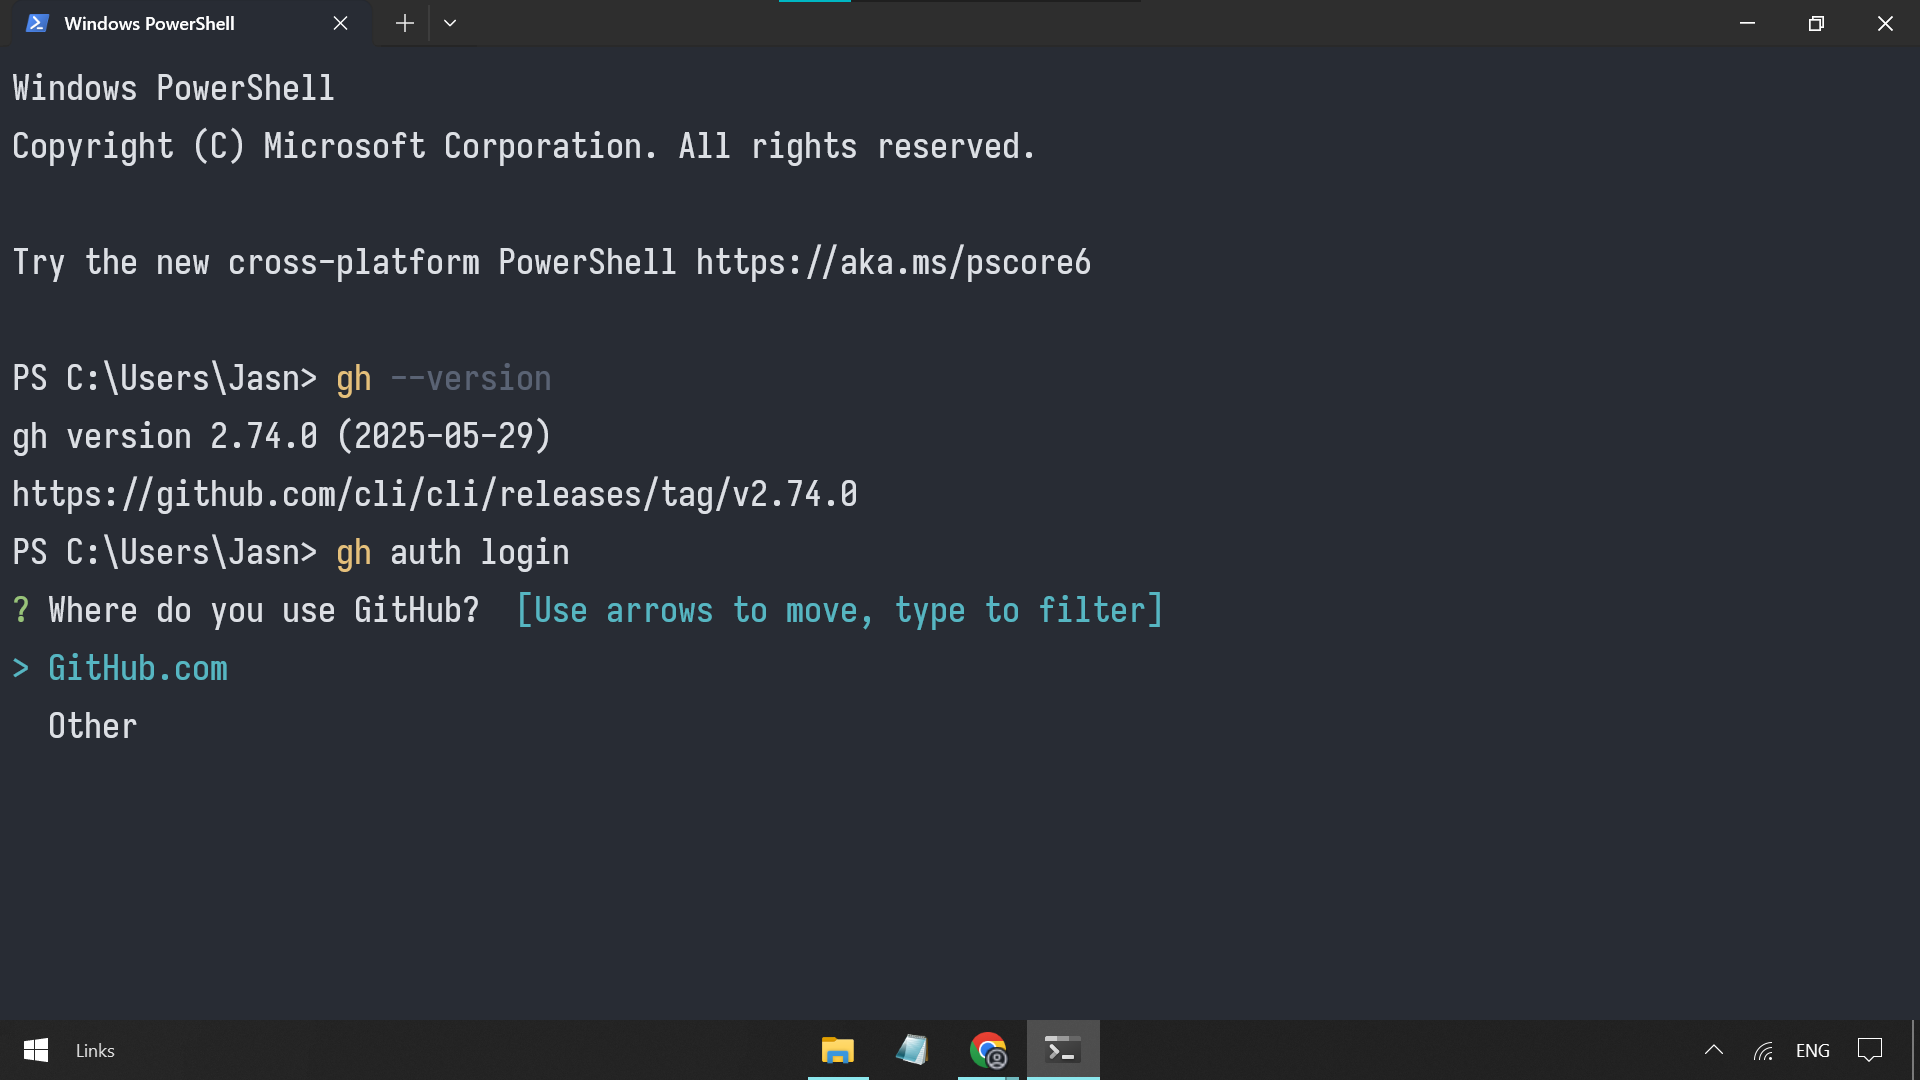
  1. In PowerShell, type:

    gh auth login
    

    GitHub Auth Login

Step 2: Configure Authentication Settings

Select Options

GitHub Auth Options

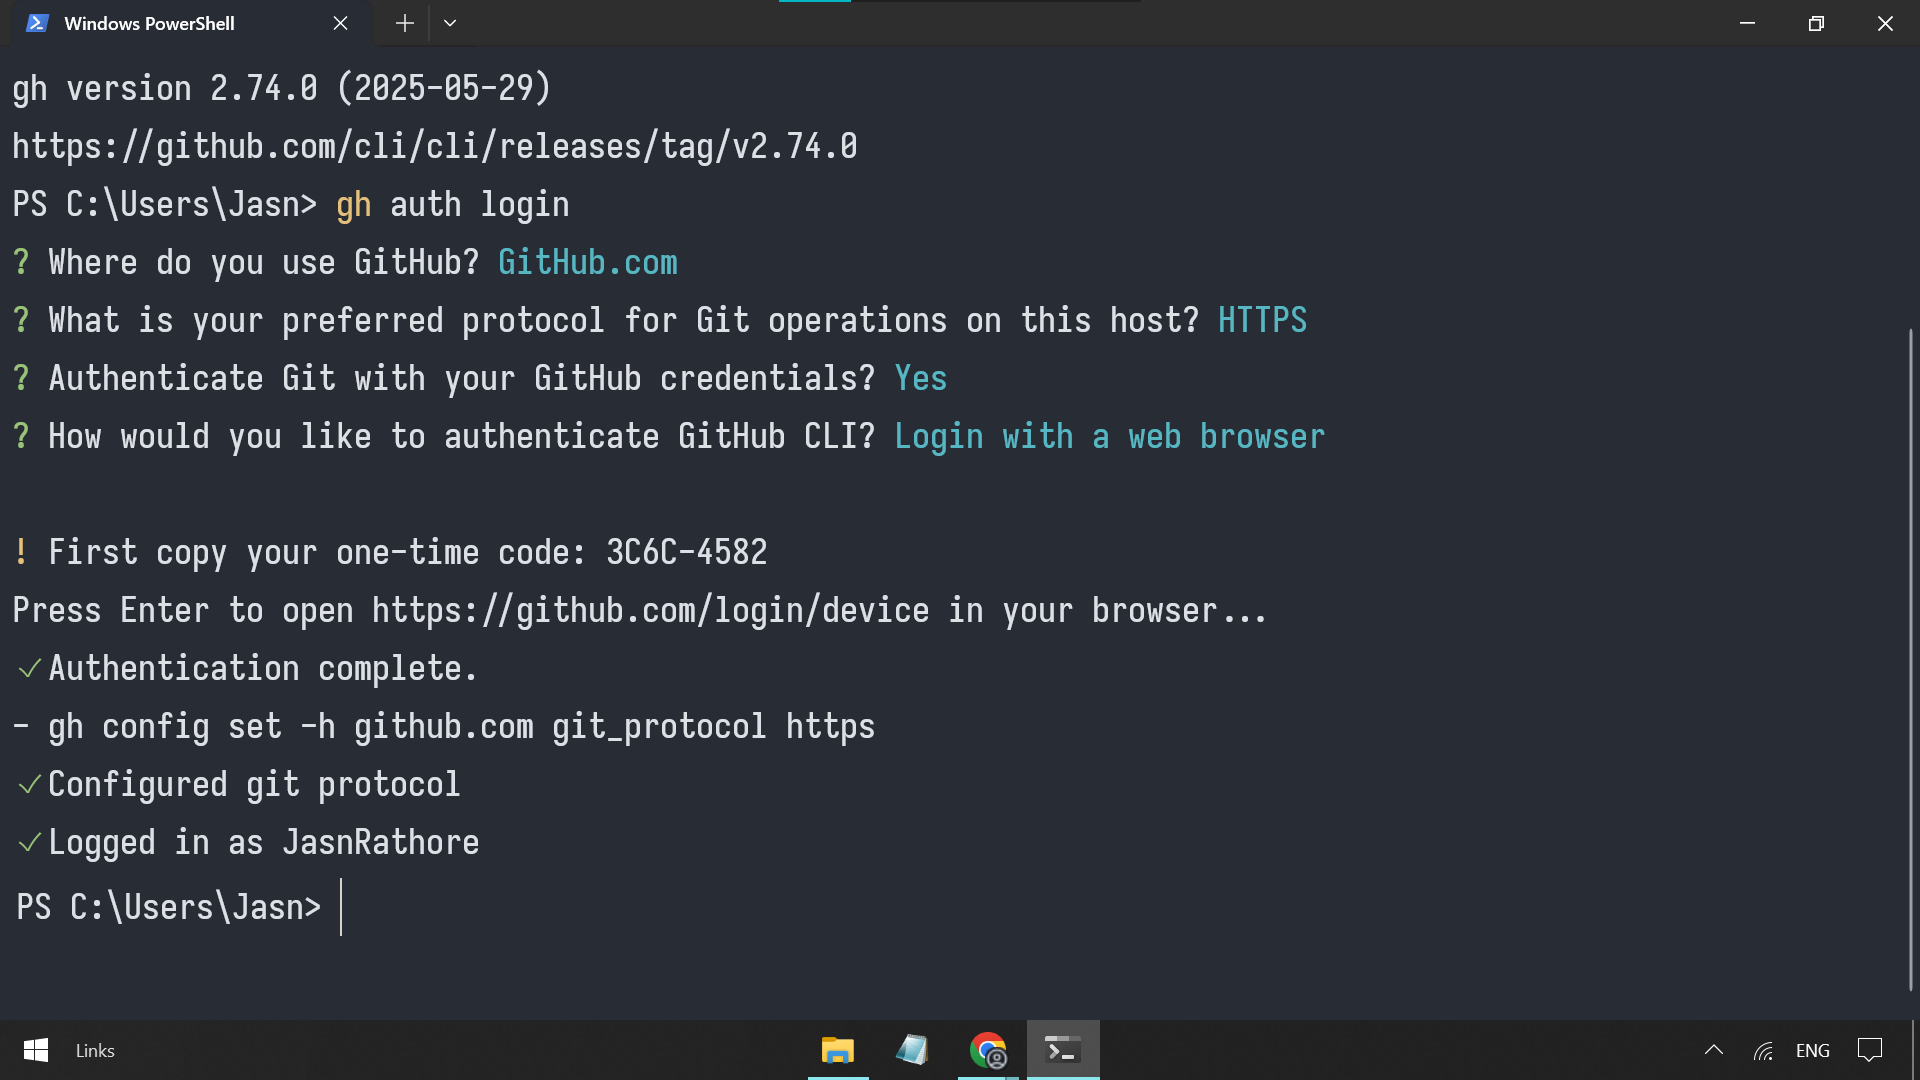
Follow the prompts and select these recommended settings:

  • Account: GitHub.com
  • Protocol: HTTPS
  • Authenticate Git: Yes
  • Authentication method: Login with a web browser

Step 3: Complete Web Authentication

Copy the One-Time Code The terminal will display an 8-character code. Copy this code and press Enter.

Browser Authentication

Browser Authentication

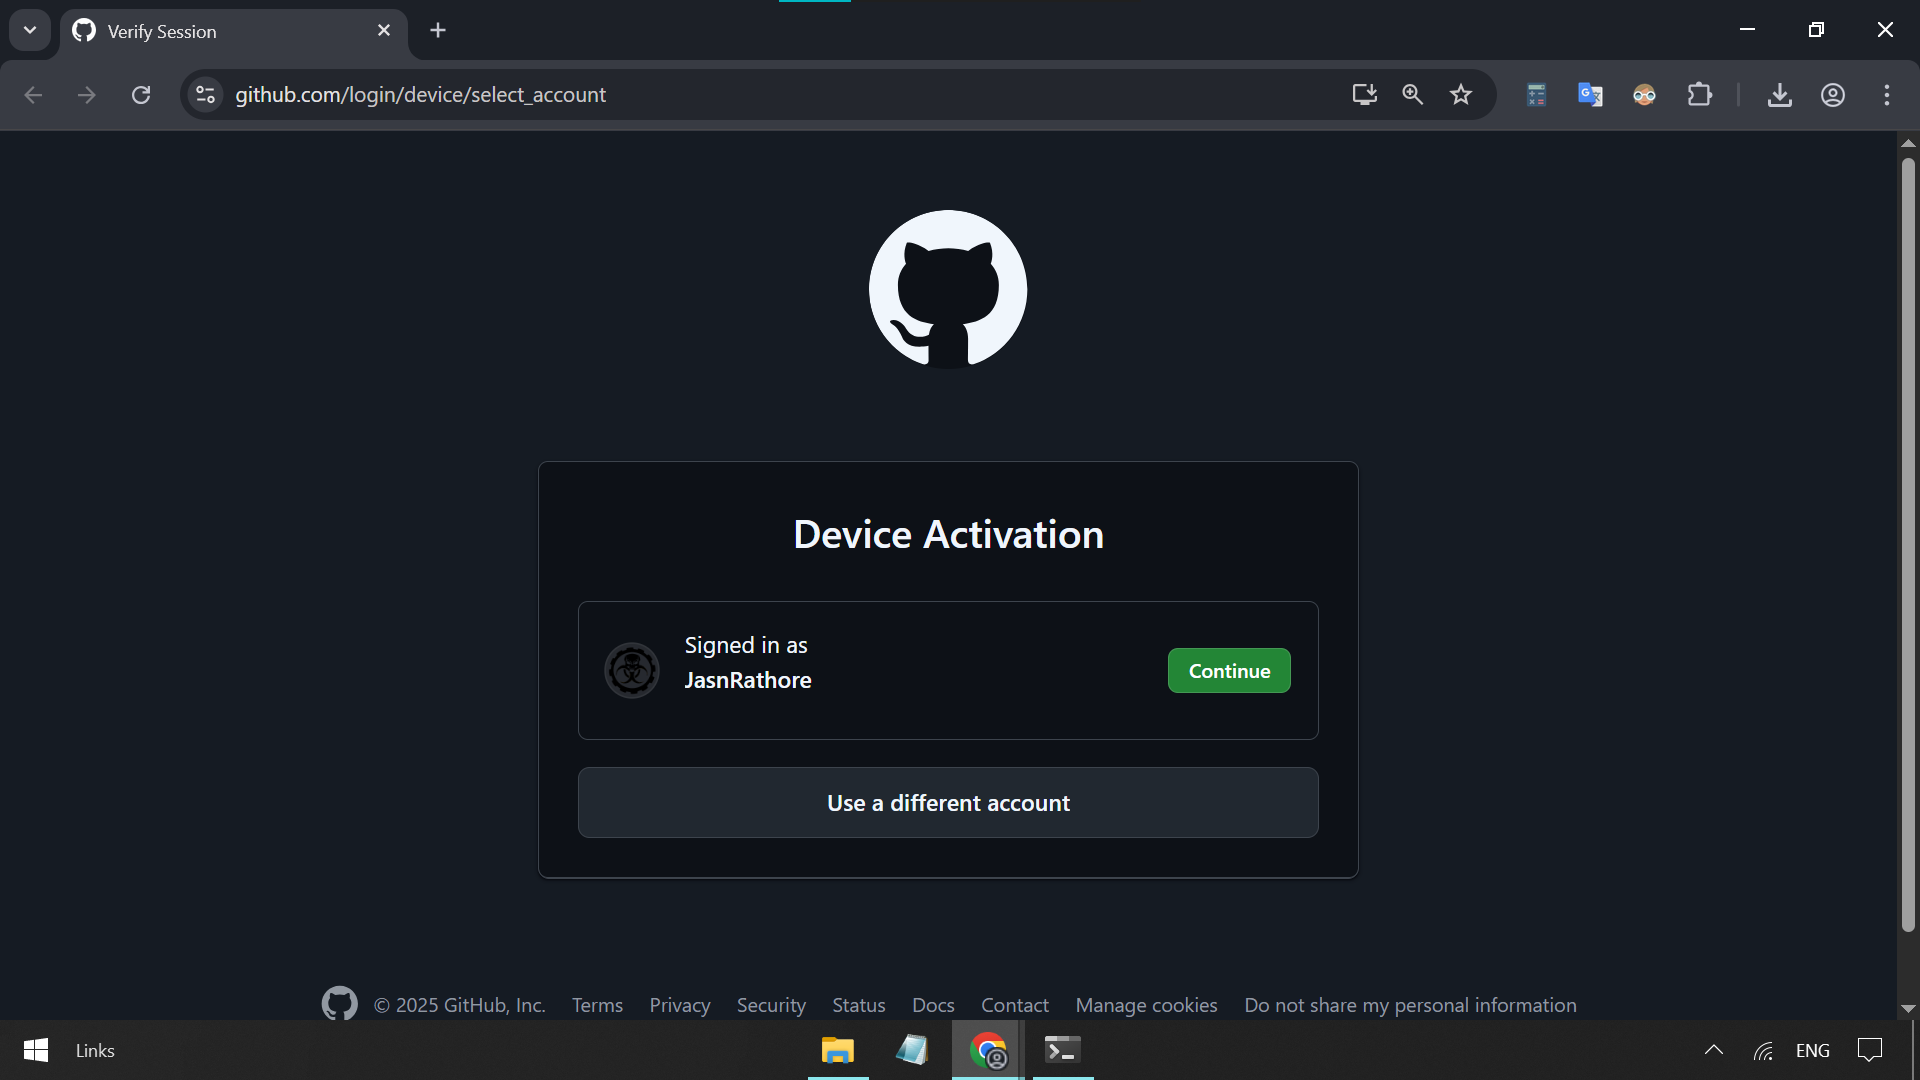
  1. Your browser should open automatically to the GitHub device activation page
  2. If it doesn't open, manually go to: https://github.com/login/device

Enter the Code

  1. Paste the copied code and click "Continue"

Enter Device Code

Authorize GitHub CLI

  1. Click "Authorize GitHub" when prompted

Authorize GitHub CLI

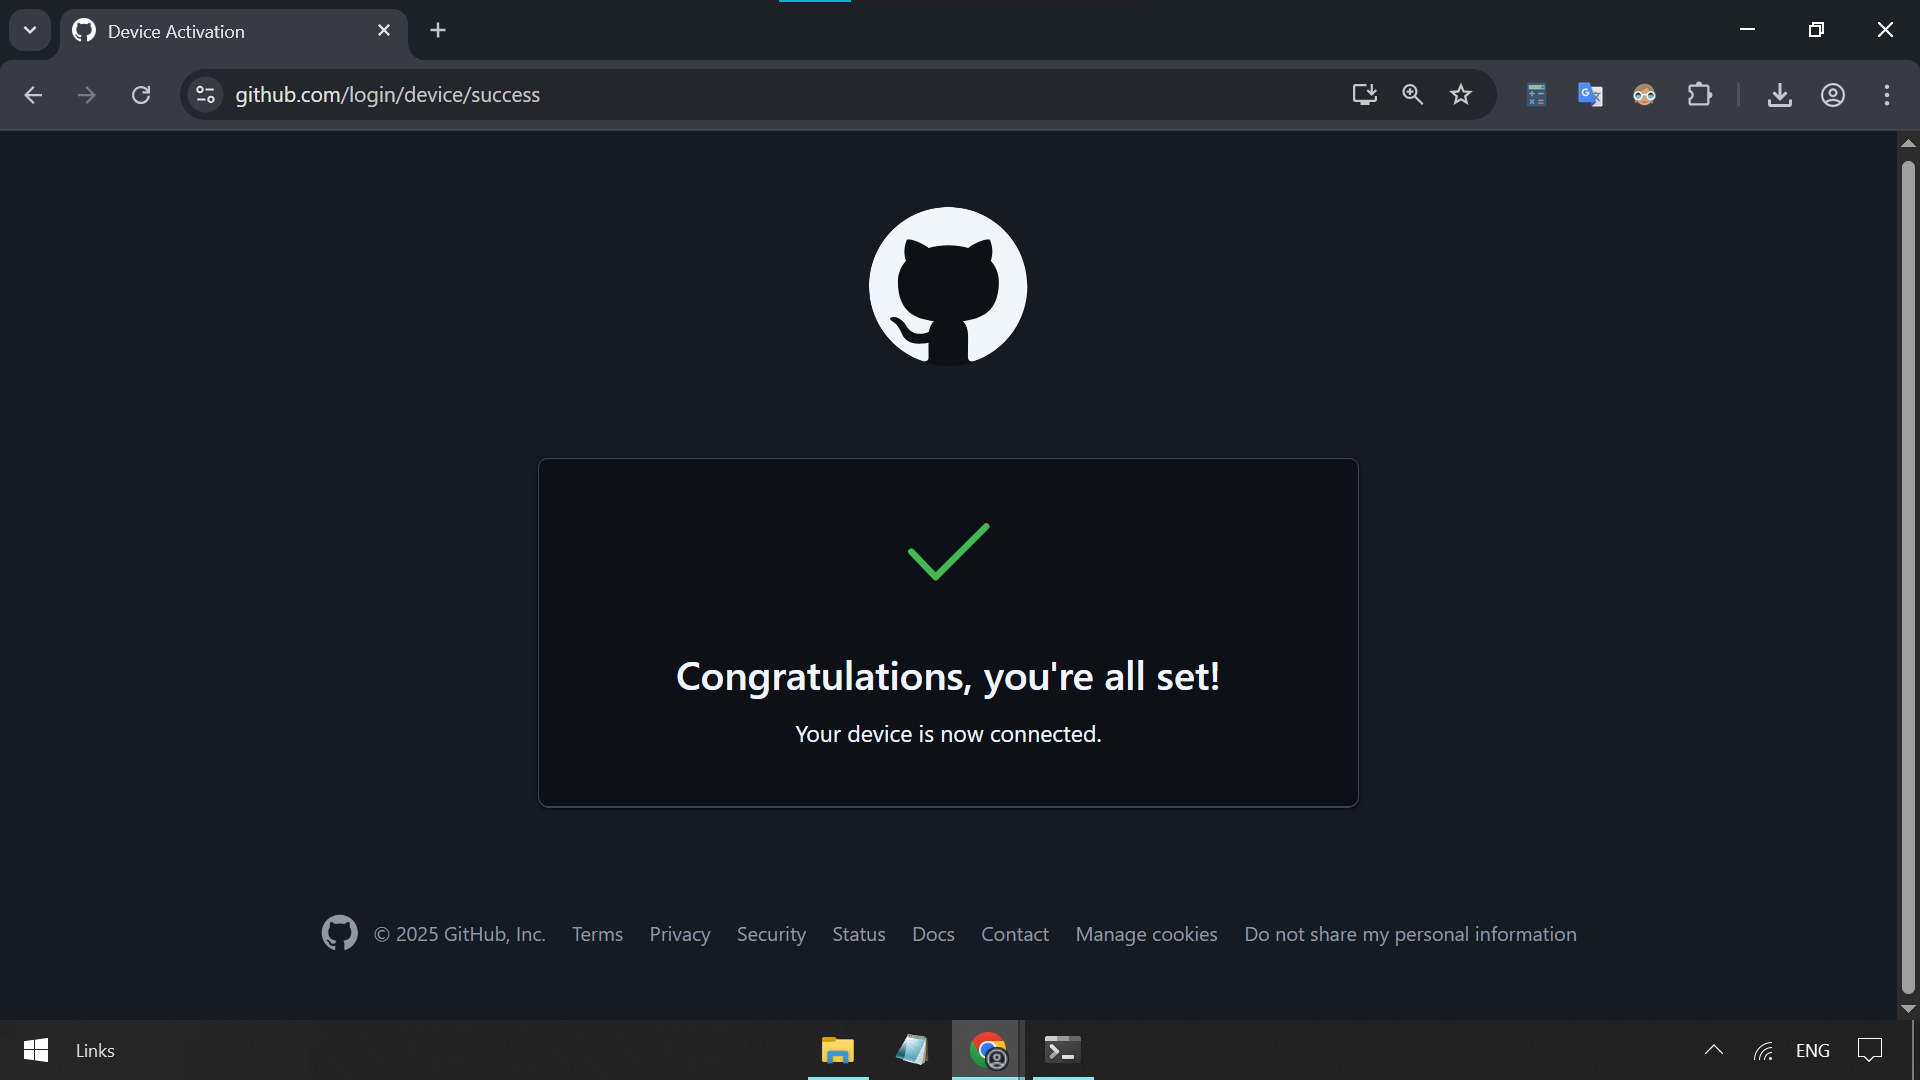
Authentication Complete

Authentication Success

Final Success

  1. You'll see success messages both in your browser and terminal

Authentication complete!


Final Verification

Test that everything is working:

Configure Git (First Time Setup)

Important Notes:

  • Use the same email address that's associated with your GitHub account
  • You can find your GitHub email in your GitHub profile settings
  • If you have email privacy enabled on GitHub, use your GitHub-provided no-reply email address (e.g., ID+username@users.noreply.github.com)
git config --global user.name "Your Name"
git config --global user.email "your.email@example.com"

Test GitHub Connection

gh repo list

If you see your repositories (or an empty list if you don't have any), everything is working perfectly!


Troubleshooting

Common Issues:

  • Git/gh command not found: Restart PowerShell after installation
  • Authentication failed: Ensure you're logged into GitHub in your browser
  • Permission denied: Run PowerShell as administrator

For more help, visit GitHub Docs or Git Documentation.


Back to Blog

The Last Git and GitHub Guide you will Ever Need

Tools & Productivity
tutorial

Prerequisites

Before we begin, make sure you have:

  • A Windows computer with administrator privileges
  • An active internet connection
  • A GitHub account (create one at github.com if you don't have one)
  • Your default browser logged into GitHub

Part 1: Installing Git

Git is the version control system that tracks changes in your code. Follow these visual steps to install it:

Step 1: Download Git

  1. Visit the official Git download page: https://git-scm.com/downloads/win
  2. Click on "Git Standalone Installer" to download the latest version

Step 2: Run the Installation Wizard

Launch the downloaded installer and follow these screens:

Welcome Screen

Git Welcome

  • Click "Next" to begin the installation

Installation Options The installer will present you with multiple configuration screens. For beginners, it's recommended to keep all default settings by clicking "Next" through each screen:
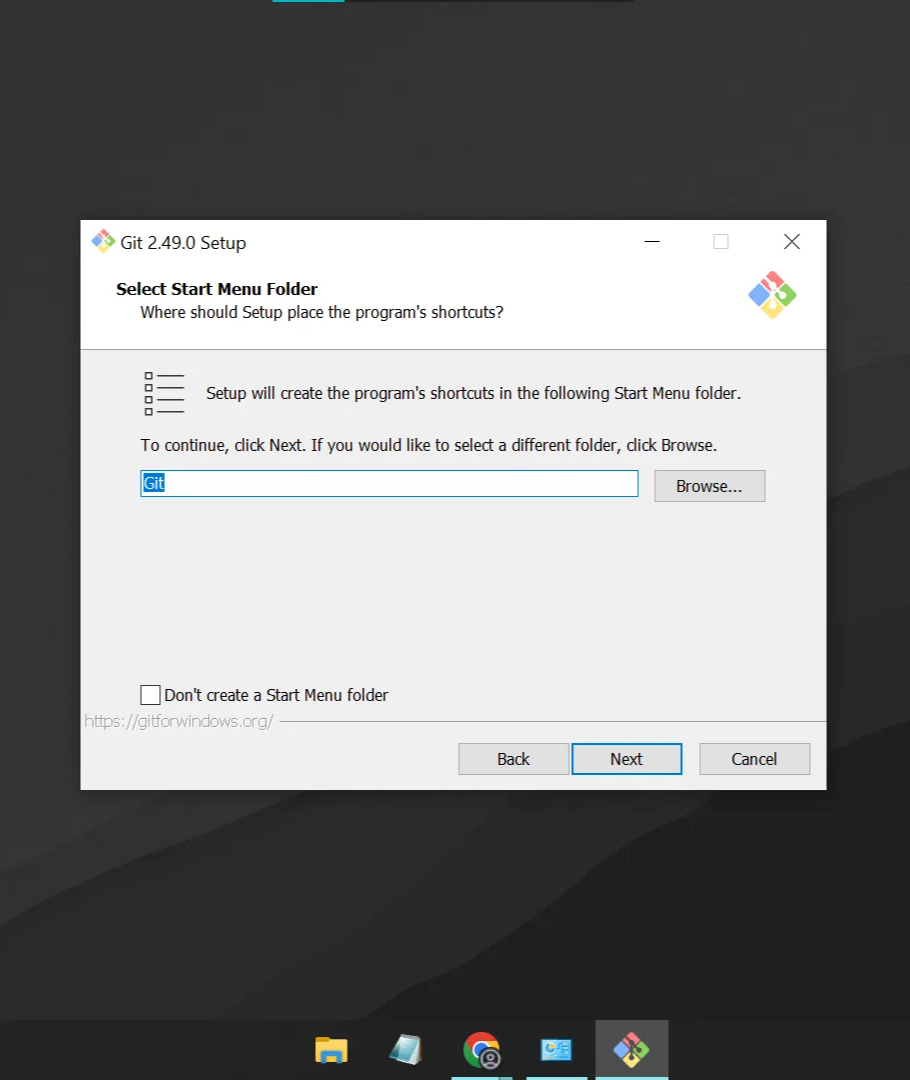
Installation Step 2 Installation Step 3 Installation Step 4 Installation Step 5 Installation Step 6 Installation Step 7 Installation Step 8 Installation Step 9 Installation Step 10 Installation Step 11 Installation Step 12 Installation Step 13

Installation Step 14

Step 3: Verify Git Installation

Open PowerShell

  1. Search for "PowerShell" in the Start menu and open it
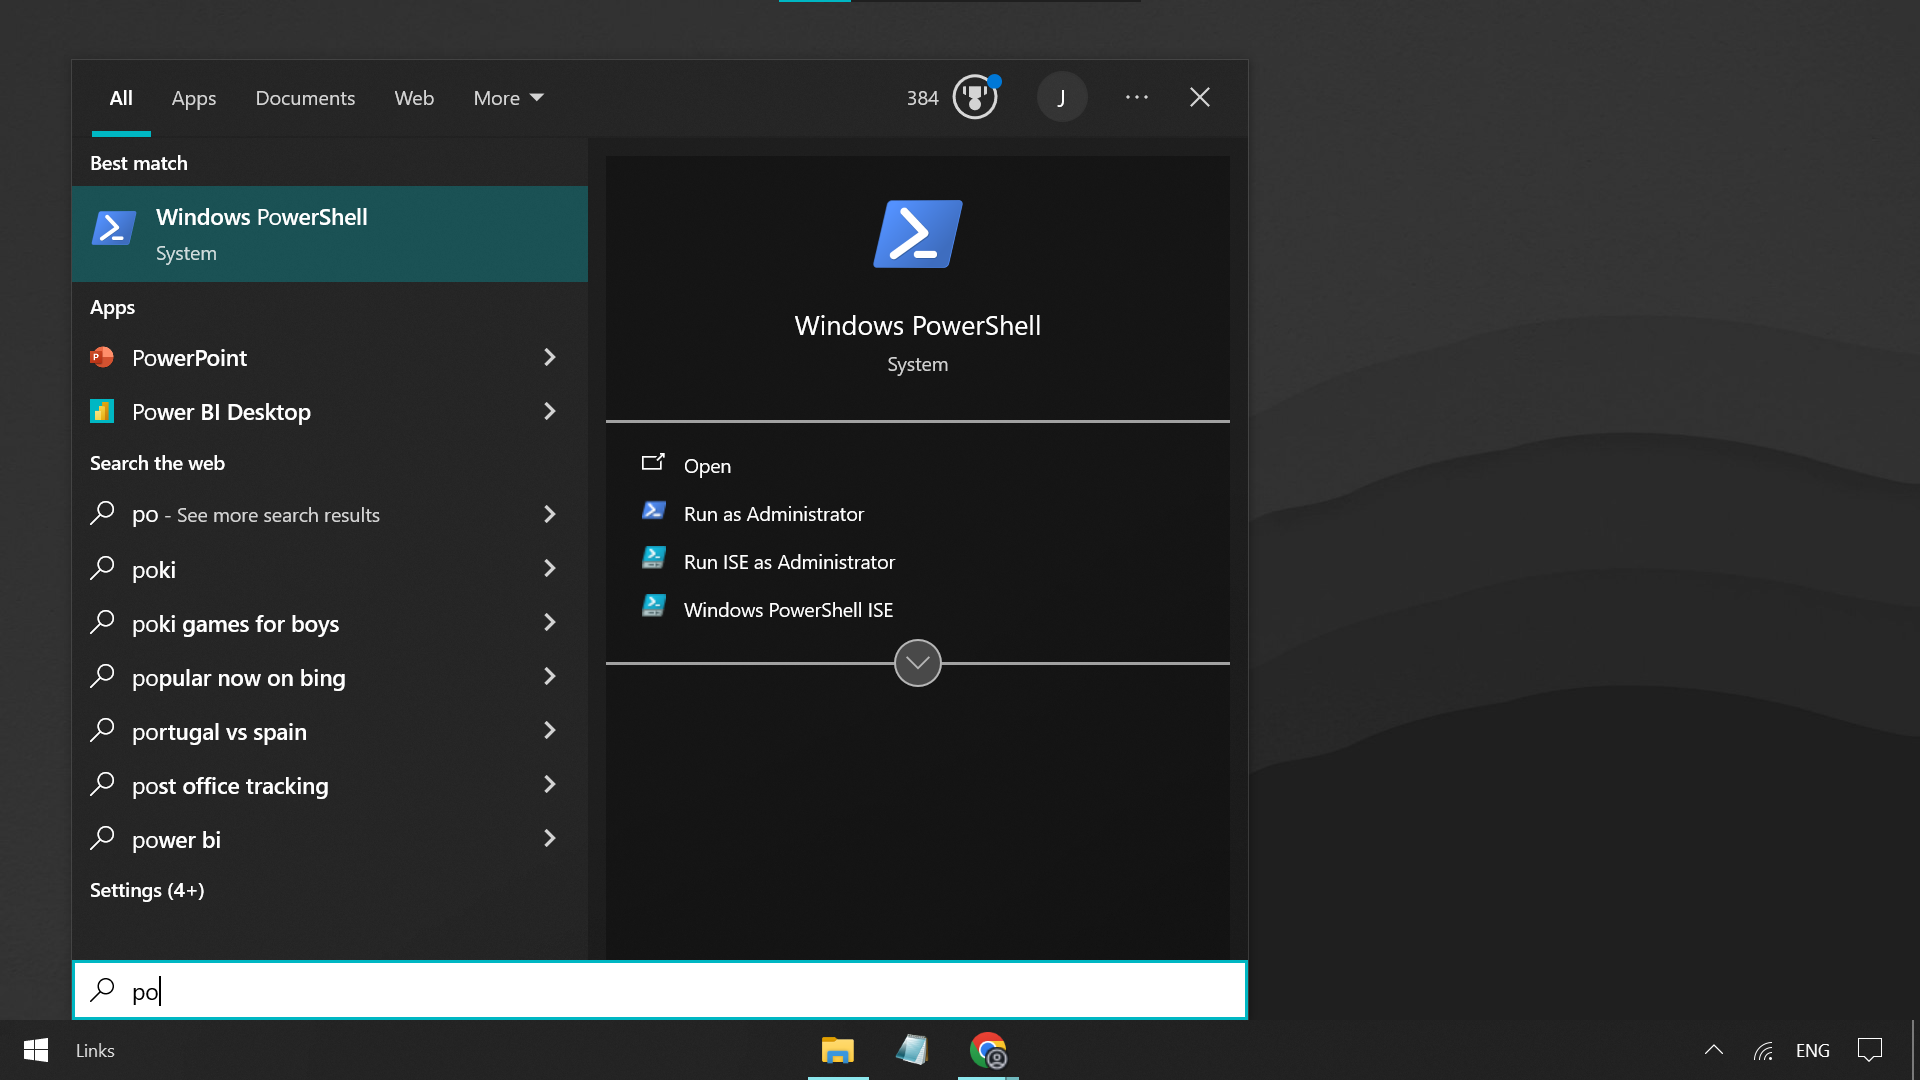
    Open PowerShell

Check Git Version

  1. Type the following command and press Enter:
git --version
  1. You should see the Git version displayed, confirming successful installation
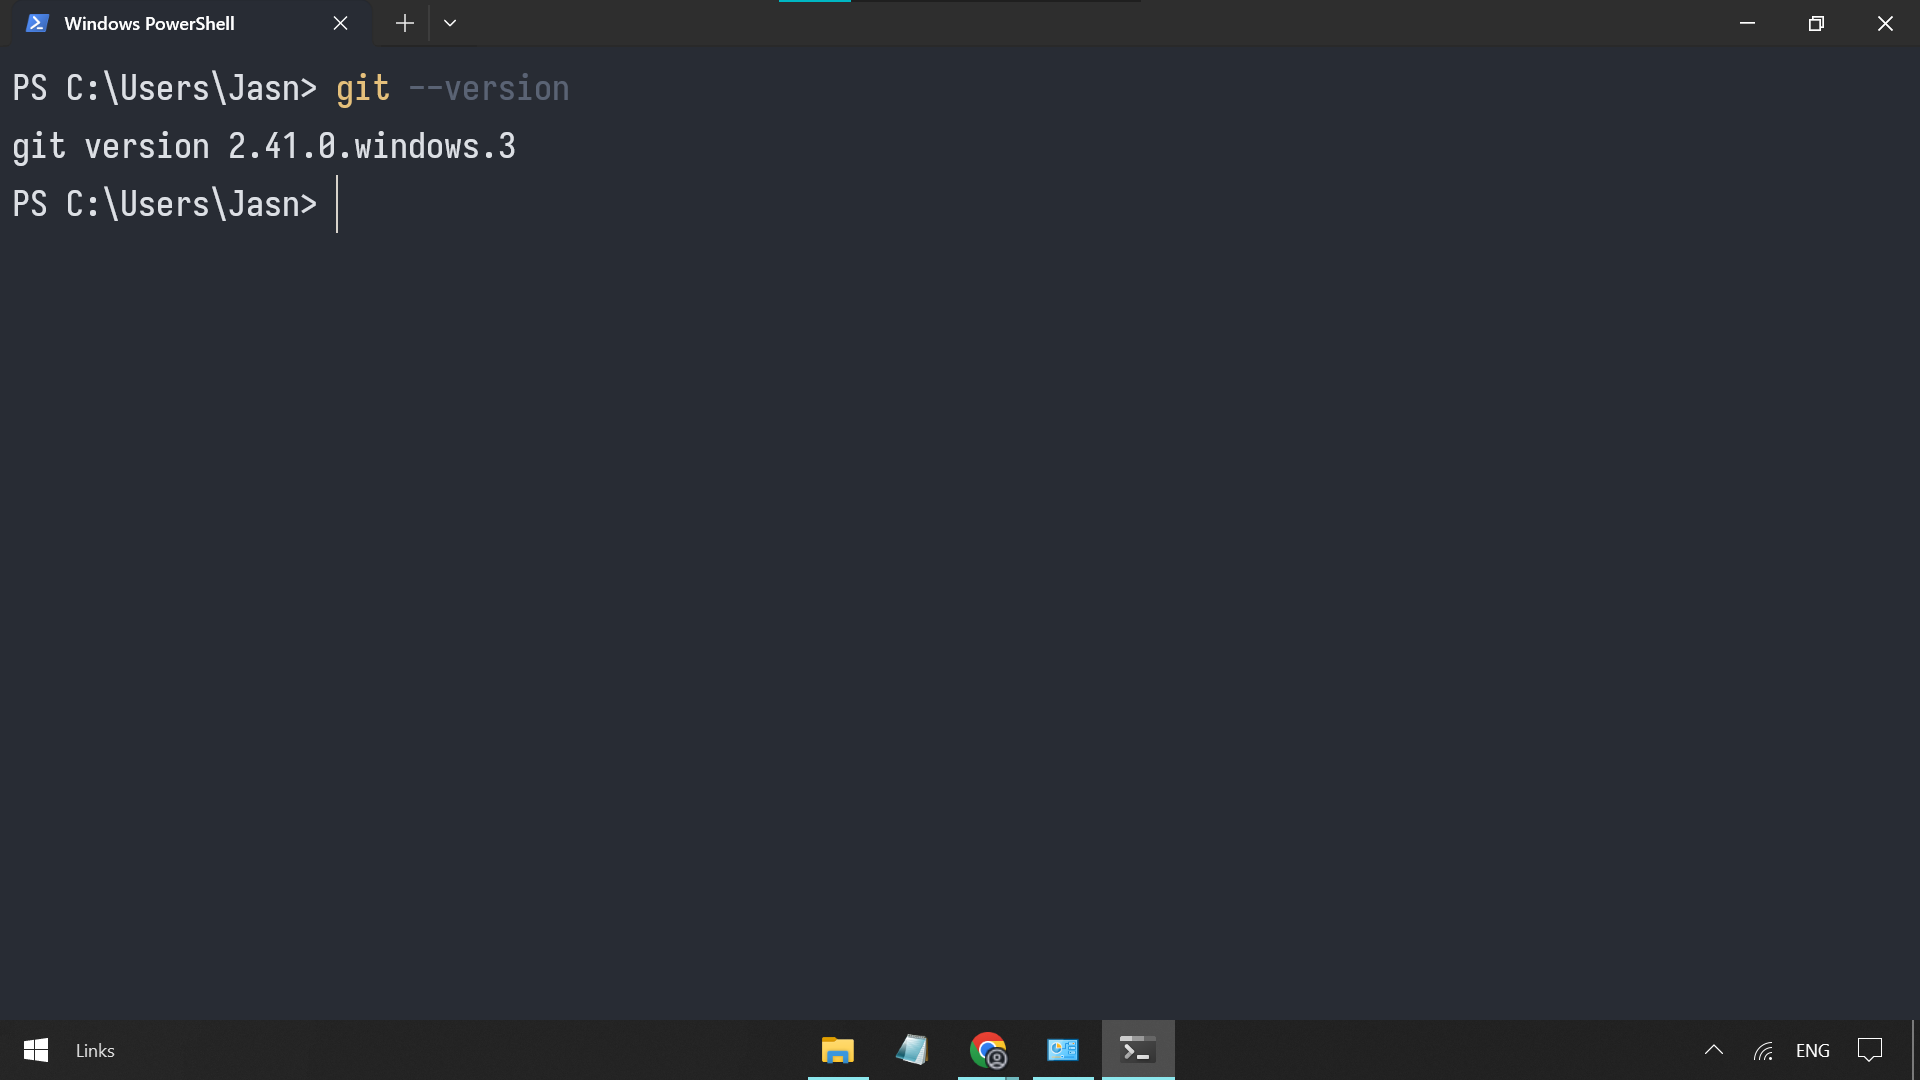
    Git Version Check

Git is now successfully installed!


Part 2: Installing GitHub CLI

GitHub CLI allows you to interact with GitHub directly from your command line.

Step 1: Download GitHub CLI

  1. Visit the GitHub CLI website: https://cli.github.com/
  2. Download the Windows installer

Step 2: Install GitHub CLI

Run the Installer

  1. Launch the downloaded installer

    GitHub CLI Installer

Installation Directory

  1. Keep the default installation directory and proceed with the installation
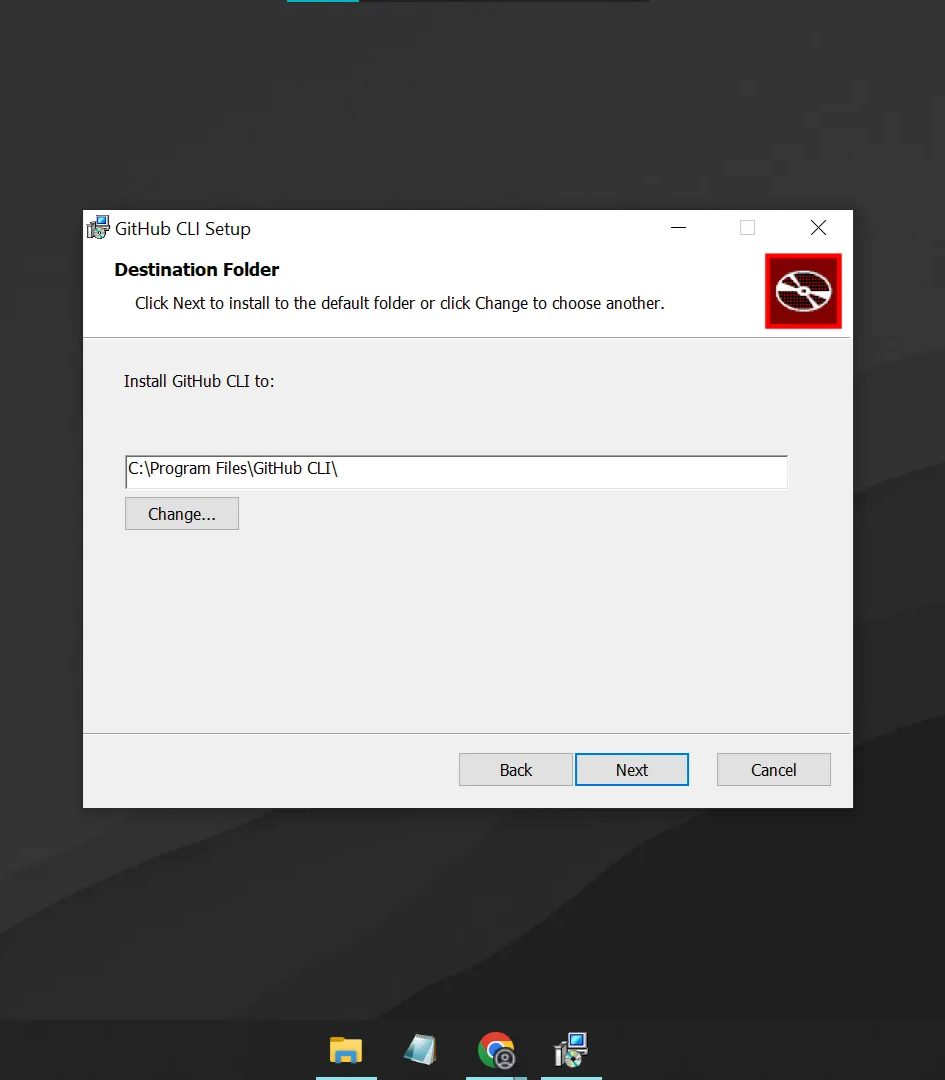
GitHub CLI Setup Step 1 GitHub CLI Setup Step 2

Step 3: Verify GitHub CLI Installation

Open PowerShell

  1. Open PowerShell (if not already open)

    Open PowerShell

Check GitHub CLI Version

  1. Type the following command:
gh --version
  1. You should see the GitHub CLI version information
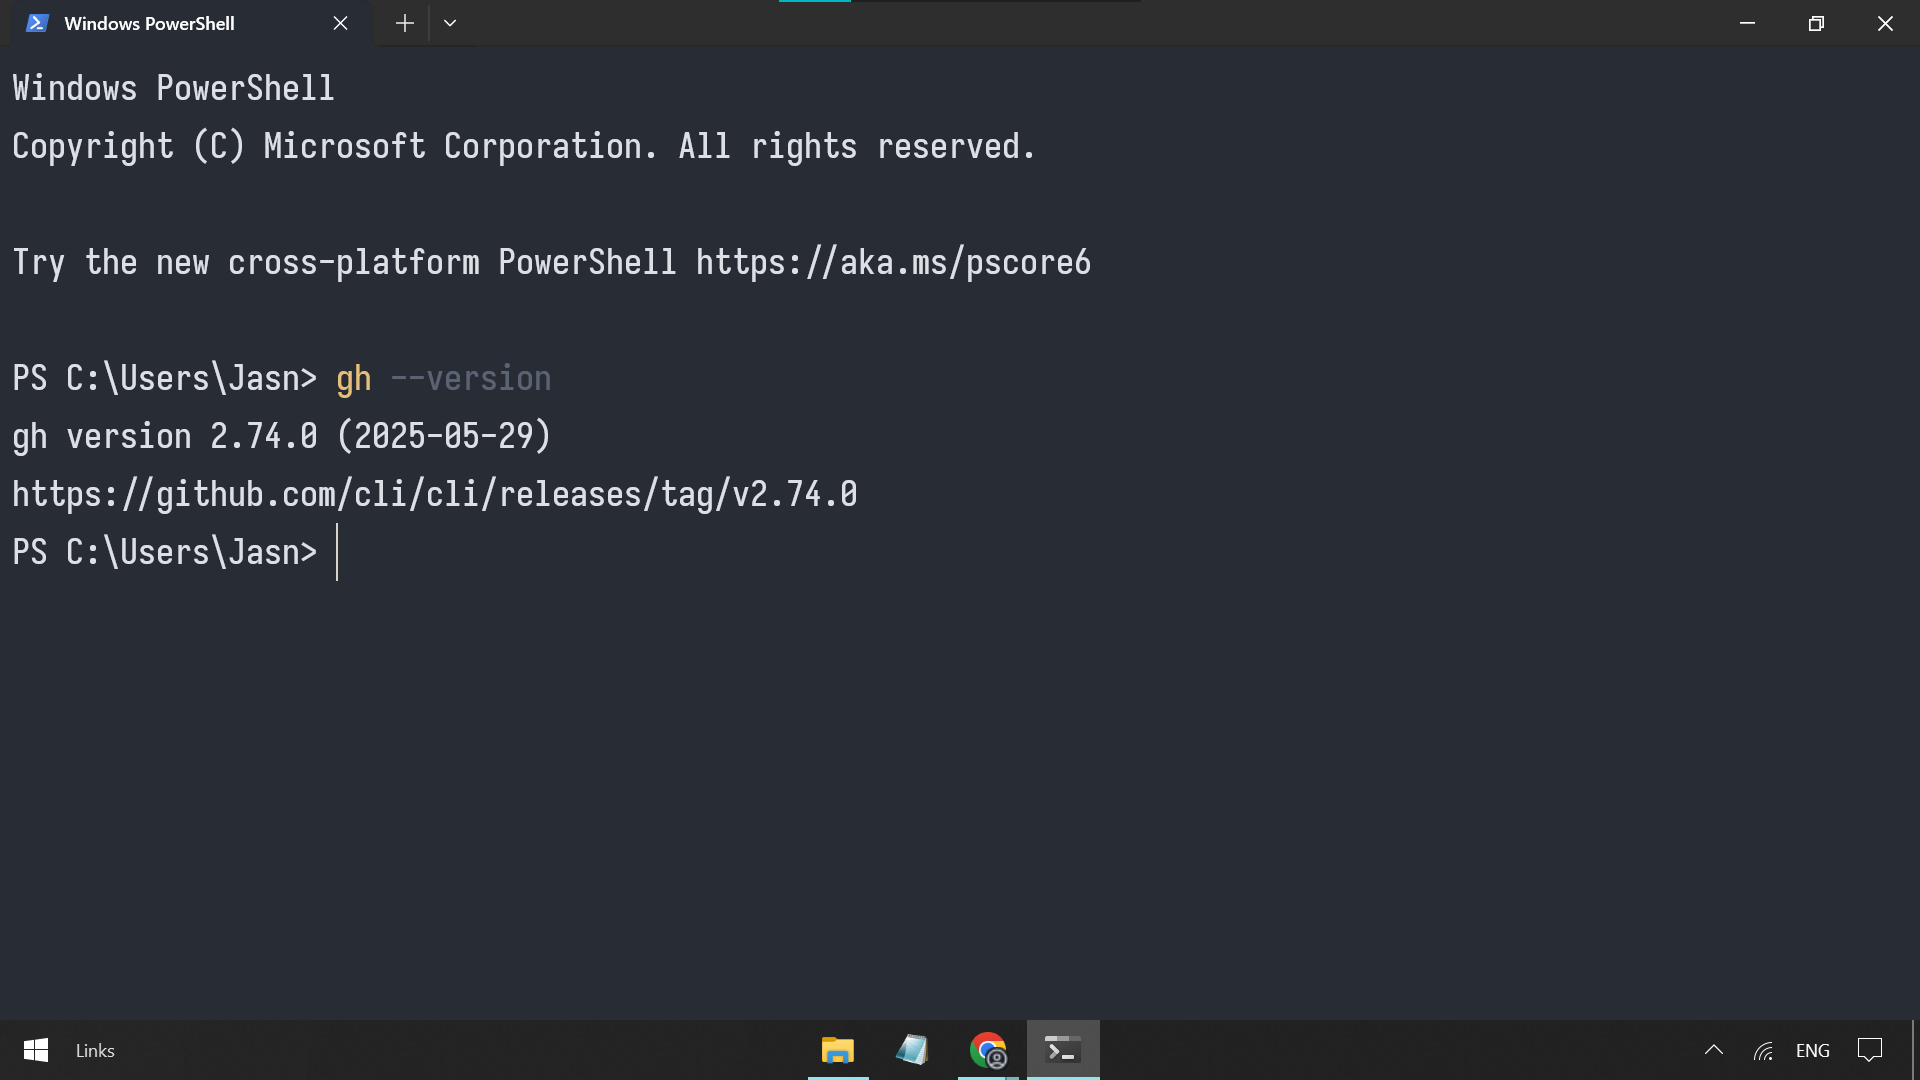
    GitHub CLI Version

GitHub CLI is now installed!


Part 3: Authenticating with GitHub

Now we'll connect your local setup with your GitHub account.

Step 1: Start Authentication Process

Initialize Login

  1. In PowerShell, type:

    gh auth login
    

    GitHub Auth Login

Step 2: Configure Authentication Settings

Select Options
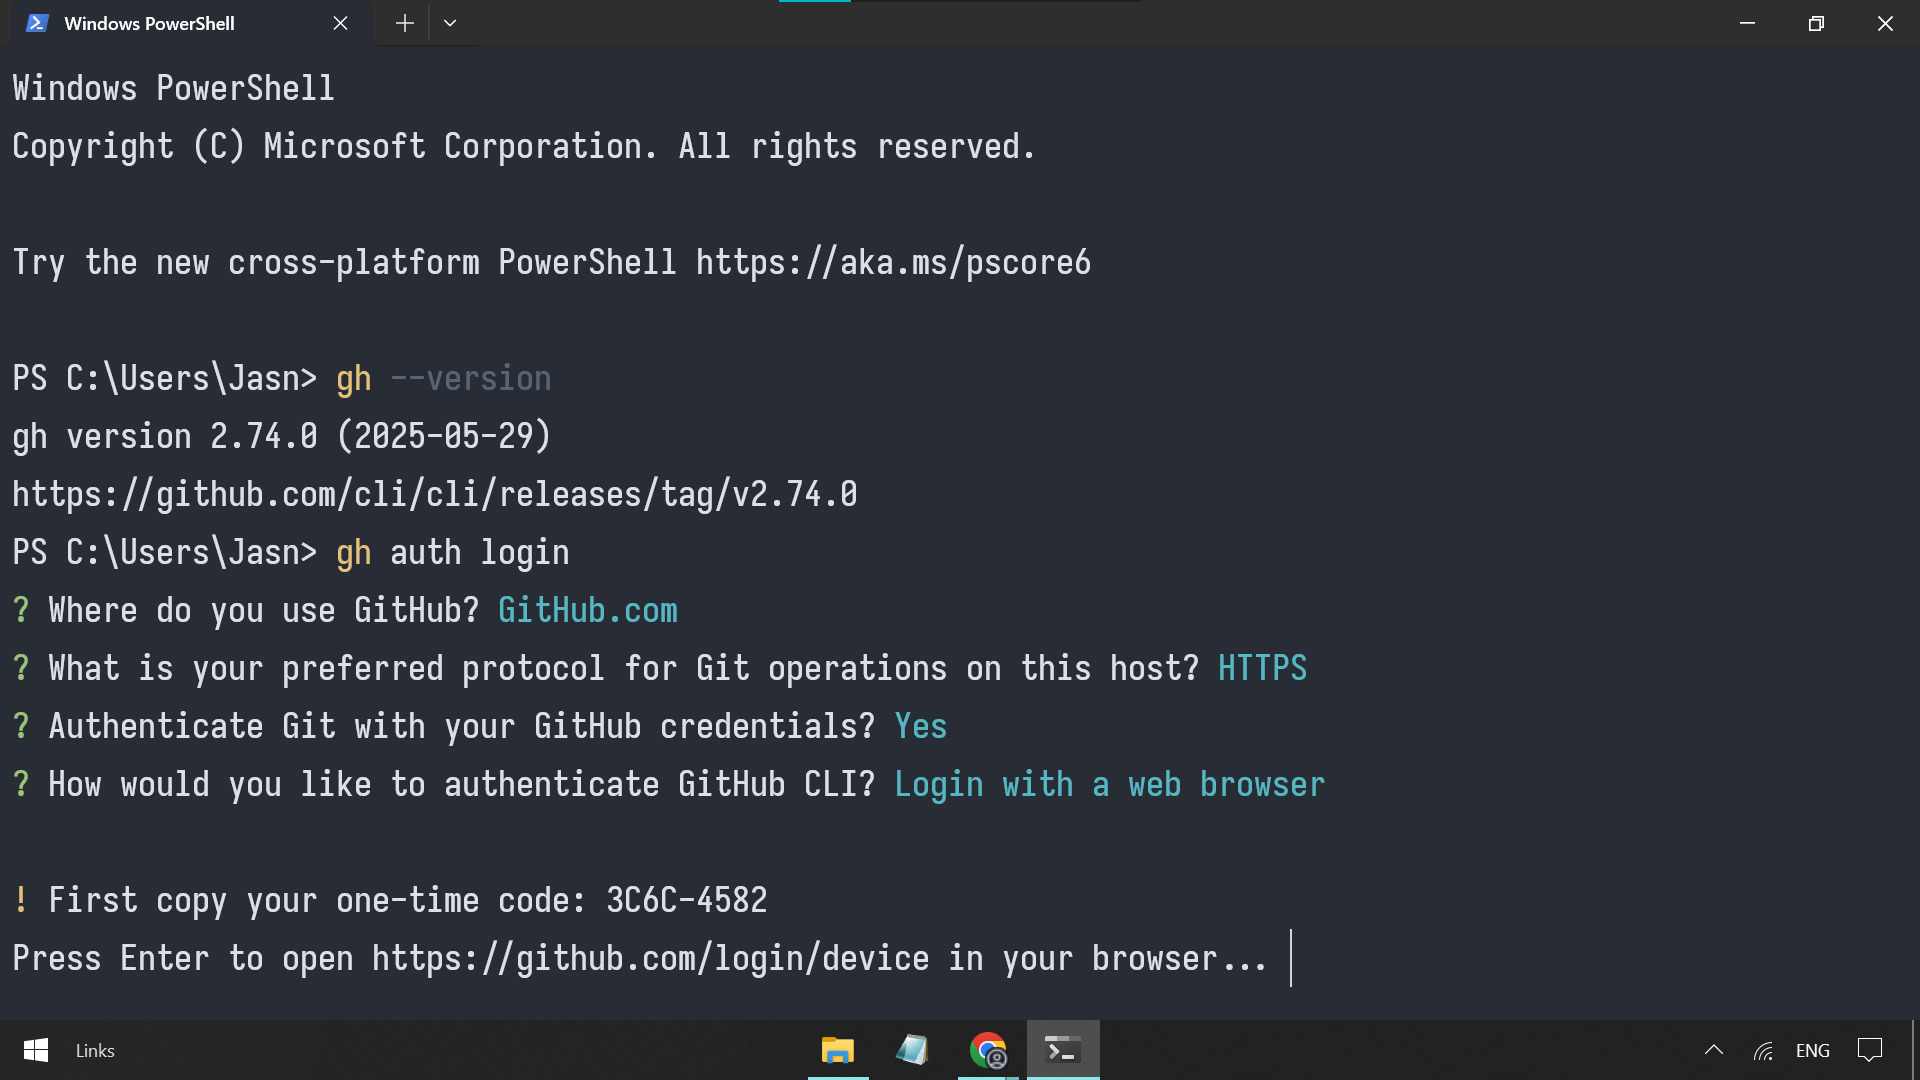
GitHub Auth Options

Follow the prompts and select these recommended settings:

  • Account: GitHub.com
  • Protocol: HTTPS
  • Authenticate Git: Yes
  • Authentication method: Login with a web browser

Step 3: Complete Web Authentication

Copy the One-Time Code The terminal will display an 8-character code. Copy this code and press Enter.

Browser Authentication
Browser Authentication

  1. Your browser should open automatically to the GitHub device activation page
  2. If it doesn't open, manually go to: https://github.com/login/device

Enter the Code

  1. Paste the copied code and click "Continue"
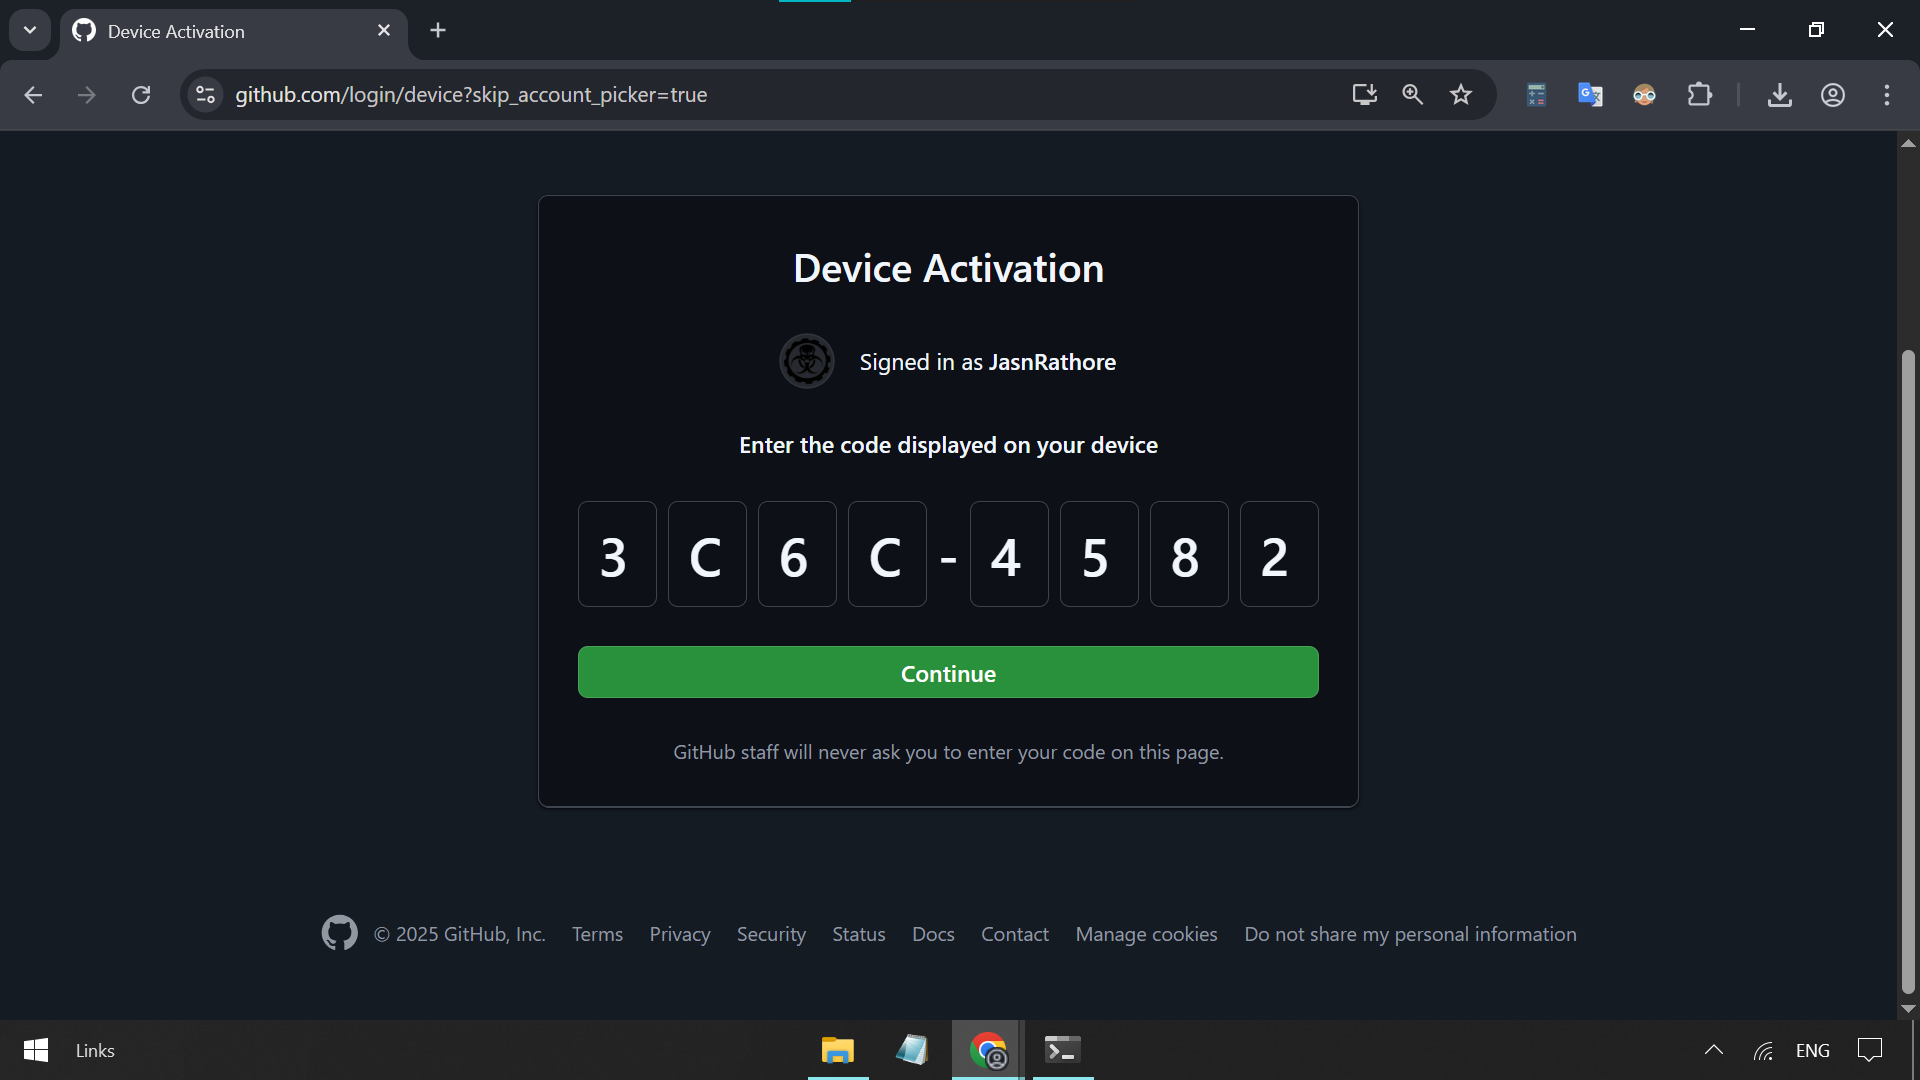
Enter Device Code

Authorize GitHub CLI

  1. Click "Authorize GitHub" when prompted
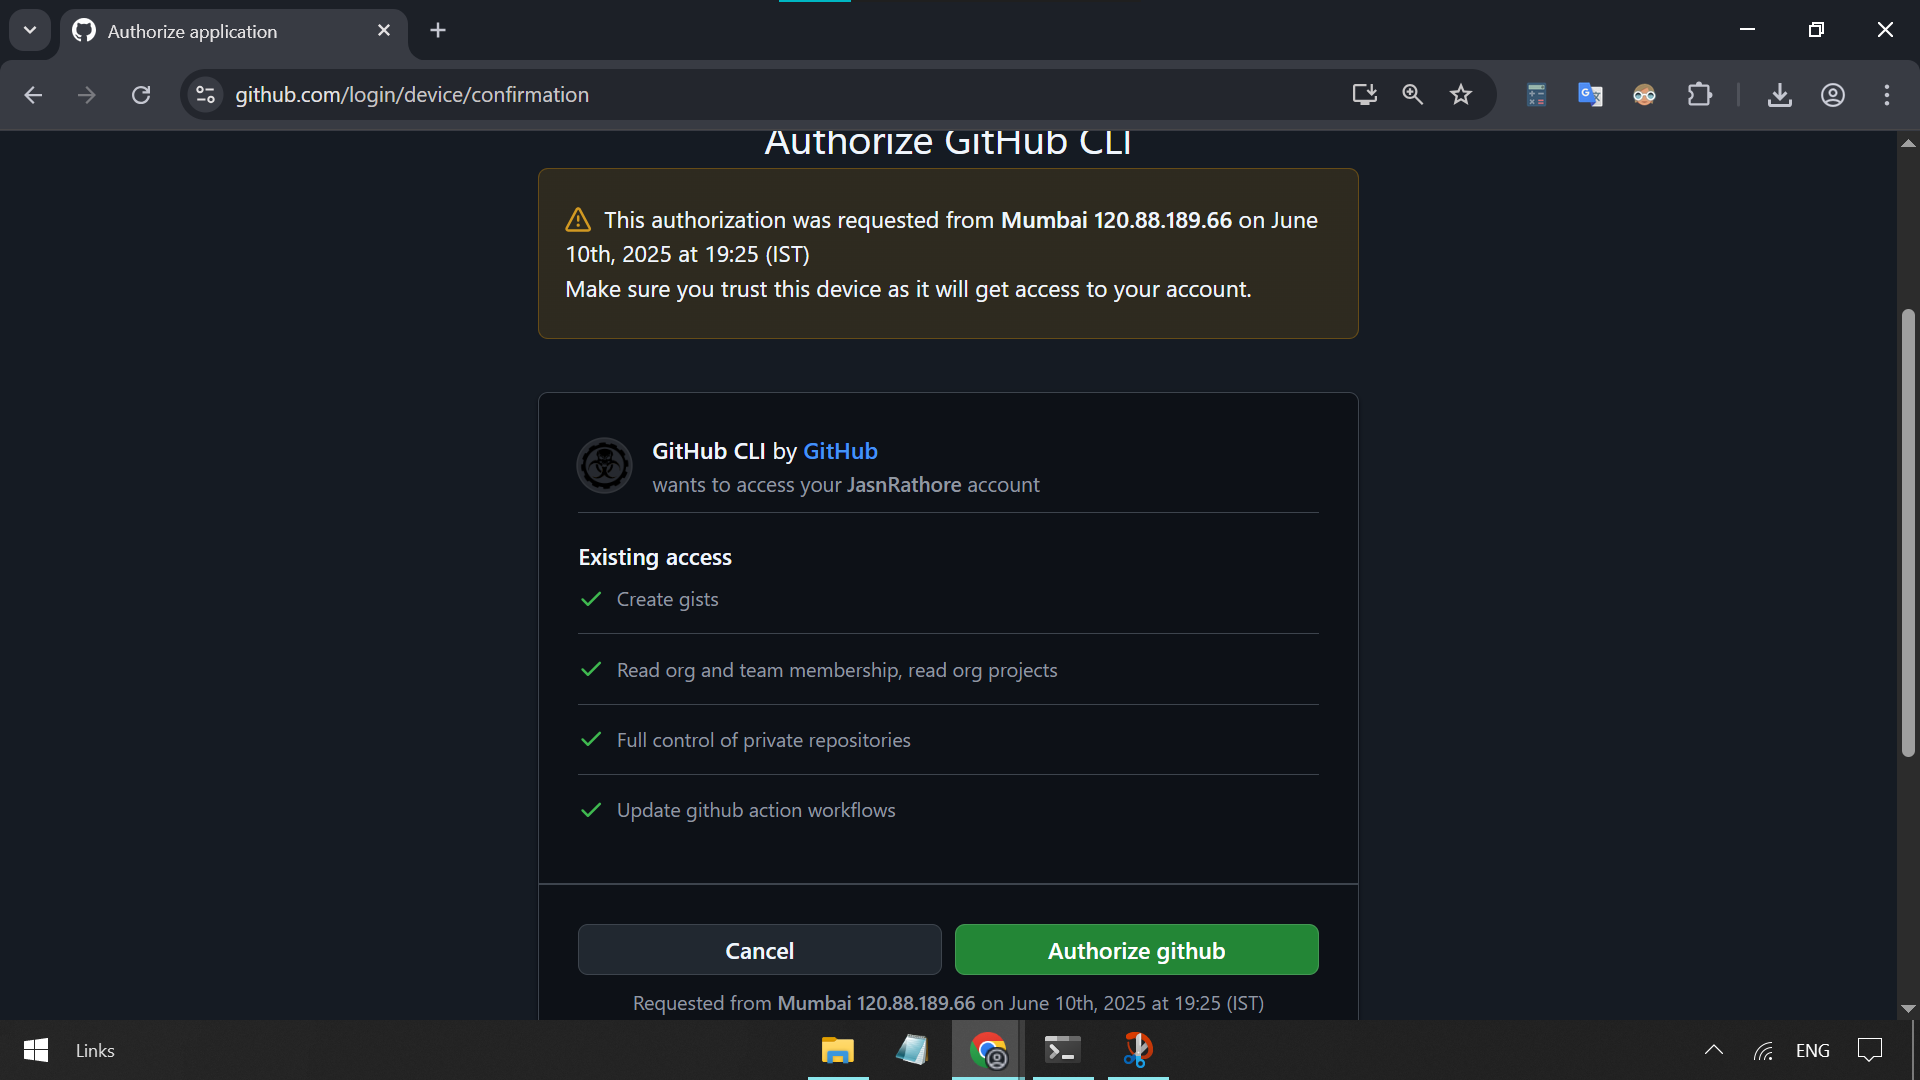
Authorize GitHub CLI

Authentication Complete

Authentication Success

Final Success

  1. You'll see success messages both in your browser and terminal

Authentication complete!


Final Verification

Test that everything is working:

Configure Git (First Time Setup)

Important Notes:

  • Use the same email address that's associated with your GitHub account
  • You can find your GitHub email in your GitHub profile settings
  • If you have email privacy enabled on GitHub, use your GitHub-provided no-reply email address (e.g., ID+username@users.noreply.github.com)
git config --global user.name "Your Name"
git config --global user.email "your.email@example.com"

Test GitHub Connection

gh repo list

If you see your repositories (or an empty list if you don't have any), everything is working perfectly!


Troubleshooting

Common Issues:

  • Git/gh command not found: Restart PowerShell after installation
  • Authentication failed: Ensure you're logged into GitHub in your browser
  • Permission denied: Run PowerShell as administrator

For more help, visit GitHub Docs or Git Documentation.